
How to Remove a Jeep Gladiator Hardtop: Complete Step-by-Step Guide

Yes, you can absolutely remove a Jeep Gladiator hardtop yourself. The 2020+ Jeep Gladiator features a modular hardtop system designed for user removal without professional service.
With the right tools and techniques, a two-person team can complete the removal in 15–30 minutes, while solo removal is possible using several proven methods in 45+ minutes.
The process requires basic Torx bits, careful attention to electrical connections, and proper lifting technique to avoid damage to the hardtop or vehicle frame.
Whether you’re preparing for summer open-air driving or need access for maintenance, this comprehensive guide covers everything from tool requirements to storage best practices, including specialized techniques for single-person removal that most guides overlook.
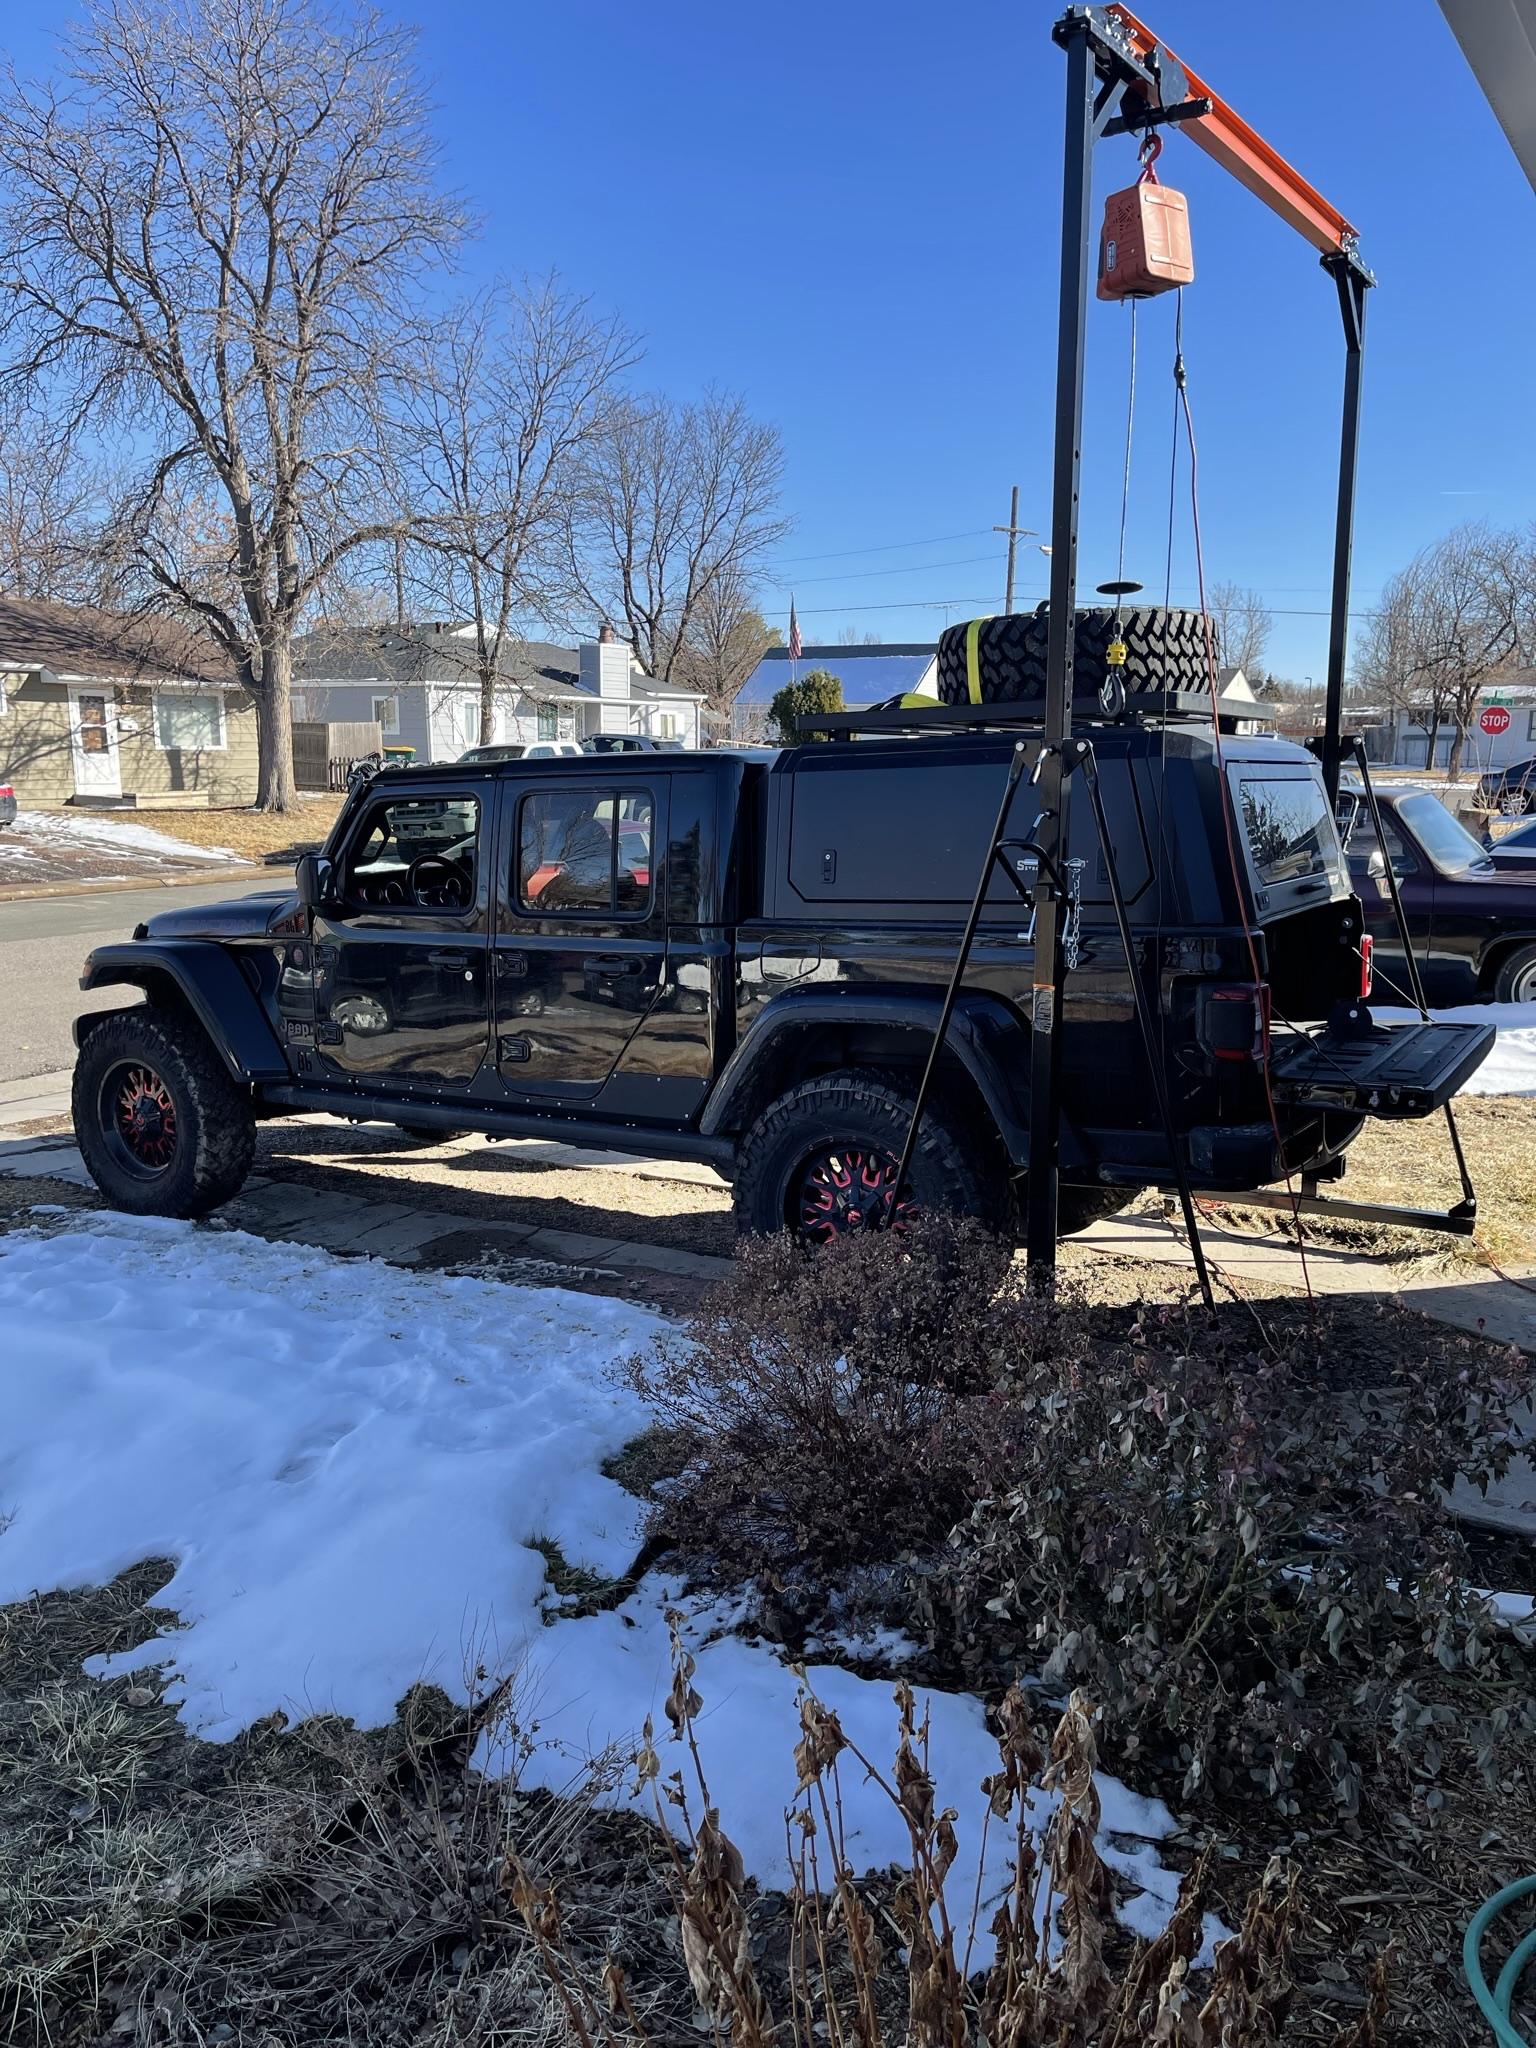
credit: https://www.jeepgladiatorforum.com/
Can You Remove a Jeep Gladiator Top Yourself?
The Jeep Gladiator hardtop removal system is engineered for owner accessibility across all JT generation models (2020–present). Unlike some convertible systems that require dealer service, the Gladiator’s modular design uses standard automotive fasteners and straightforward disconnection points.
Removal feasibility depends on your situation:
- Two-person removal: Recommended approach; 15–30 minutes with proper preparation
- Solo removal: Achievable using multiple proven techniques; 45+ minutes depending on method
- Tool-assisted removal: Premium hardtop removal tools can reduce solo time to approximately 2 minutes
The primary challenge isn’t weight—most owners report the hardtop weighs between 100 and 150 pounds—but rather awkwardness during positioning and movement. The weight distribution is rear-heavy, creating a tipping tendency that requires careful handling regardless of your physical strength.
Risk factors to consider: Rushing the process increases the likelihood of stripped bolt threads, damaged electrical connections, or scratched paint. However, when performed methodically, hardtop removal poses minimal risk to your vehicle. The system is designed for repeated use, and many Gladiator owners remove their tops seasonally without issues.
Success requires basic mechanical familiarity—specifically, comfort using ratcheting tools and identifying electrical connectors. If you’ve performed basic automotive maintenance like changing air filters or checking fluids, you have sufficient mechanical background for hardtop removal.
Tools & Materials You’ll Need
Proper tool selection streamlines the removal process and prevents common complications. Most required items are standard automotive tools, though a few Gladiator-specific considerations apply.
Essential tools:
- Torx bit set: T-50 (short) and T-40 (long) bits with ratcheting handle
- Work gloves: Protect hands from sharp metal edges during lifting
- Helper: Strongly recommended for first-time removal; optional for experienced owners
Storage and protection materials:
- Beach towel or moving blanket: Prevents scratches during storage and transport
- Storage bag: Many Gladiator hardtops include a dedicated storage bag with compartments for panels
- Hardware container: Small bowl or magnetic tray for bolt organization
Optional equipment for enhanced convenience:
- Hardtop removal tool: Premium option like the hardtop removal tool from TopLift Pros reduces solo removal time to under 2 minutes
- Garage lifting system: Four ceiling-mounted eye bolts with cam buckle straps for assisted solo removal
- Sawhorses or storage rack: Dedicated storage solution for garages with adequate space
Workspace requirements:
Clear at least 8 feet of space behind your Gladiator for safe hardtop placement after removal. If using a two-person lifting method, ensure adequate overhead clearance (10+ feet) to avoid contact with garage doors or ceiling fixtures. For solo removal methods, prepare your truck bed area with protective materials before beginning the process.
The most commonly forgotten tool is a small container for hardware organization. Gladiator hardtops use multiple bolt lengths and types—losing or mixing these fasteners complicates reinstallation significantly.
Pre-Removal Checklist: What to Do First
Proper preparation prevents the most common removal complications and ensures smooth hardtop separation. These steps address electrical connections, hardware access, and workspace setup that many first-time removers overlook.
Critical preparation steps:
- Lower all windows completely: Partially raised windows can bind against door seals during hardtop removal, potentially causing seal damage or preventing clean separation
- Clear the truck bed: Remove tonneau covers, cargo, and any accessories that might interfere with hardtop placement
- Disconnect the rear window electrical connector: Located near the rear seat area, this red-tabbed connector powers the rear window defroster and must be disconnected before lifting
Access and workspace preparation:
- Remove interior trim panels: Gain access to concealed bolts by carefully removing plastic trim pieces around the rear seat area
- Organize your hardware storage: Set up your magnetic tray or small container within easy reach of both sides of the vehicle
- Check overhead clearance: For two-person removal, measure available height above your workspace—you’ll need clearance to lift the hardtop completely off the frame
Safety and damage prevention:
- Inspect electrical connections: Look for any aftermarket wiring or modifications that might complicate disconnection
- Clean bolt heads: Remove dirt or debris from Torx bolt heads to prevent bit slippage and stripped fasteners
Many experienced owners recommend taking photos of electrical connector positions before disconnection. This documentation proves invaluable during reinstallation, especially if you’re removing the hardtop infrequently. The rear window connector, in particular, has a specific orientation that isn’t immediately obvious when reconnecting.
Expected preparation time: 5–10 minutes for experienced users; 15–20 minutes for first-time removal. This upfront investment significantly reduces complications during the actual removal process.
Step-by-Step: Removing the Hardtop with Two People
The two-person removal method represents the most straightforward approach, following the procedure documented in Motor Trend’s comprehensive hardtop removal guide and verified across multiple owner experiences.
Step 1: Remove the front mounting bolts
Position your T-50 Torx bit and ratchet to access the bolts located above the driver and passenger windows. These bolts secure the hardtop to the roll cage at the A-pillar connection points. Turn counterclockwise until bolts are completely removed—typically 8–12 full rotations. Store bolts immediately in your organized container.
Step 2: Access rear seat area bolts
Move to the interior rear seat area and locate the plastic trim panels concealing additional mounting points. Carefully remove these panels by lifting at the edges—they typically use plastic clips rather than screws. Once exposed, you’ll find the remaining mounting bolts that secure the rear portion of the hardtop.
Step 3: Disconnect electrical systems
Locate the red-tabbed electrical connector for the rear window defroster system. Press the red locking tab while pulling the connector apart. This step is critical—failing to disconnect electrical connections before lifting can damage the wiring harness or connector pins.
Step 4: Remove rear mounting bolts
Remove the black plastic cover below the rear window to expose the final four mounting bolts. Use your T-40 Torx bit for these fasteners, as they’re typically longer than the front bolts. Complete removal requires careful attention—partially loosened bolts can catch during lifting and cause damage.
Position and Lift Technique
Step 5: Position helpers for optimal leverage
Both people should position themselves on opposite sides of the truck, standing near the front doors. Place hands under the leading edge of the hardtop above the door opening areas—this provides the best initial lifting leverage and balance control.
Step 6: Initial lift and weight assessment
Press upward gently to test the hardtop’s freedom of movement. If you encounter resistance, stop immediately and verify that all bolts are completely removed and electrical connections disconnected. The hardtop should lift freely with minimal effort once properly prepared.
Step 7: Coordinate the lift and walk
Both helpers should lift simultaneously, working fingers under the rear edge of the hardtop. Begin walking together toward the rear of the truck, carrying the roof over the bed area until completely clear of the vehicle frame.
Managing the Weight and Tipping Risk
Critical technique notes: The hardtop is significantly heavier at the rear due to the rear window assembly. Expect a backward tipping tendency as you lift—the person on the passenger side should be prepared for this weight shift. Maintain communication throughout the lift, calling out any balance issues immediately.
Expected completion time: 15–30 minutes, including preparation and storage. Most of this time involves bolt removal and electrical disconnection—the actual lifting process typically takes less than 5 minutes with proper coordination.
Common coordination mistakes: Uneven lifting speed between helpers; inadequate communication about weight shifts; attempting to rush the walk-back process. Take your time during the carry phase—dropping or losing control of the hardtop can cause significant damage to both the roof and your vehicle.
Solo Removal Methods & Techniques
Solo hardtop removal addresses the largest content gap in most guides, yet community-tested solo removal strategies demonstrate multiple viable approaches. The key insight from experienced owners: awkwardness, not weight, presents the primary challenge.
When Solo Removal Makes Sense
Solo removal becomes necessary when helpers aren’t available, during emergencies requiring hardtop access, or for owners who prefer self-reliance. While more challenging than two-person removal, solo techniques are proven across different physical capability levels—including successful removal by owners in their 70s using appropriate methods.
Method 1: Truck Bed Towel Slide
This technique uses your truck bed as a staging area. Lay a beach towel or moving blanket across your bed area. After removing all bolts and disconnecting electrical connections, lift the rear edge of the hardtop slightly and slide it backward to rest on the towel.
The towel allows you to slide the hardtop laterally toward the driver or passenger side, then tip it up on its rear edge for final removal. This method works best for owners with standard physical strength and truck beds without tonneau covers.
Method 2: Rear Window Climb Technique
Remove all mounting bolts and disconnect wiring as in the standard procedure. Open the rear sliding window completely. Climb into the truck bed and position yourself so you can thread one arm through the rear window opening while standing.
This technique provides leverage to lift the hardtop from inside the bed area. Particularly effective for shorter owners who can’t reach the hardtop effectively from ground level.
Method 3: Garage Lifting System
Install four eye bolts in your garage ceiling above where you typically park your Gladiator. Use four cam buckle straps connected to each corner of the hardtop. Lift each corner incrementally, rotating between straps to raise the hardtop evenly off the vehicle frame.
This method accommodates owners with limited physical strength—one forum user reported successful removal at age 76 using this technique. Requires permanent garage setup but provides the safest solo option.
Method 4: Commercial Hardtop Removal Tool
Premium lifting tools like those from TopLift Pros use mechanical advantage to raise the hardtop off the frame in approximately 2 minutes. While expensive (typically $300+), these tools eliminate physical strain and awkward positioning. Best suited for frequent hardtop removal or owners with physical limitations.
Safety Precautions for Solo Lifters
Critical safety considerations: Never attempt solo removal if you have back problems, shoulder injuries, or limited grip strength. The awkward positioning required for solo methods can exacerbate existing physical issues.
Environmental factors: Ensure adequate lighting and non-slip footing around your vehicle. Many solo removal attempts fail due to poor workspace conditions rather than inadequate strength.
Backup planning: Always have a contingency plan if you lose control during the lift. Know where you can safely rest the hardtop if you need to reposition your grip or take a break.
Expected solo completion time: 45+ minutes for traditional methods; 5–10 minutes with commercial removal tools. Allow extra time for first attempts—rushing solo removal significantly increases injury and damage risk.
Safe Storage & Hardware Management
Proper storage protects your investment and ensures hassle-free reinstallation. Gladiator hardtops represent a significant value component—replacement costs can exceed $3,000—making careful handling essential.
Storage options by situation:
If your hardtop included a factory storage bag, use the designated compartments for different panels and components. Unzip the storage pockets and slide panels into their corresponding sections. The bag provides weather protection and organized storage for seasonal removal.
Alternative storage solutions: For owners without factory storage bags, climate-controlled garage storage works well. Position the hardtop on sawhorses or moving blankets to protect the finish from scratches. Avoid direct sunlight exposure, which can damage seals and fade interior surfaces over time.
Hardware organization best practices: Use the designated storage compartment under your truck’s rear seats if available, or transfer all bolts to a clearly labeled container. Many owners recommend taking a photo of bolt organization before removal—different sections use different lengths and thread pitches.
Electrical connection protection: Keep electrical connectors clean and dry during storage. Cover exposed connector ends with plastic bags if storing in dusty environments. Corrosion on connector pins can cause defroster system failures after reinstallation.
Interior trim panel management: Snap interior trim panels back into place immediately after hardtop removal. This maintains a finished appearance and prevents loss of small plastic clips that secure these panels.
Long-term storage considerations: For extended storage periods (months), inspect seals and weatherstripping regularly. Apply appropriate protectants to rubber components to prevent cracking and deterioration. Position stored hardtops to avoid pressure points that could deform sealing surfaces.
Expected storage setup time: 5–10 minutes for bag storage; 15–20 minutes for garage setup with protective measures. Proper storage setup prevents damage and significantly reduces reinstallation time.
Common Mistakes to Avoid
Understanding frequent removal errors helps prevent damage and frustration. These mistakes are compiled from owner forums, professional guides, and service center experiences.
Electrical system damage: The most expensive mistake involves pulling the hardtop without fully disconnecting the rear window wiring harness. This can damage connector pins, break wiring, or destroy the defroster system entirely. Always verify complete electrical disconnection before any lifting attempt.
Window and seal damage: Attempting removal with partially raised windows can bind the hardtop against door seals, potentially tearing expensive weatherstripping or jamming the removal process. Always lower all windows completely before beginning.
Helper positioning errors: Poor helper coordination causes most two-person removal accidents. Inadequate communication about weight shifts, uneven lifting speed, or helpers positioned at different heights creates dangerous imbalance conditions. Establish clear communication protocols before lifting.
Hardware management failures: Rushing bolt removal leads to stripped threads from improperly seated Torx bits, lost hardware, or mixed bolt lengths that complicate reinstallation. Use proper technique—ensure Torx bits are fully seated before applying torque, and organize hardware immediately upon removal.
Storage-related damage: Storing hardtops in direct sunlight accelerates seal degradation and can cause interior panel warping. Similarly, storage without adequate support can create pressure points that permanently deform sealing surfaces. Always use appropriate protective measures and support points.
Procedural shortcuts: Skipping interior panel removal to “save time” makes bolt access difficult and increases the likelihood of incomplete fastener removal. Following the complete procedure prevents complications and reduces overall removal time.
Environmental negligence: Attempting removal in windy conditions, on uneven surfaces, or with inadequate lighting significantly increases accident risk. Choose appropriate weather and workspace conditions for safe removal.
Understanding these common failure points allows you to focus attention on critical steps and avoid the most frequent sources of damage and frustration.
FAQ
How heavy is a Jeep Gladiator hardtop?
While exact specifications aren’t published, owner reports consistently estimate 100–150 pounds total weight. However, the awkward weight distribution and rear-heavy balance present more challenges than the absolute weight. Most owners report that maneuvering difficulty, rather than lifting strength, determines removal success.
How long does removal take?
Timeline varies significantly by method: 15–30 minutes with two experienced people; 45+ minutes for solo removal using traditional techniques; approximately 2 minutes with commercial removal tools. First-time attempts typically take longer due to unfamiliarity with bolt locations and electrical connections.
Do I need special tools?
Basic automotive tools suffice: T-50 and T-40 Torx bits with a ratchet handle. Work gloves are recommended for hand protection. Commercial hardtop removal tools are optional premium alternatives, not requirements. Most owners already have the necessary tools in their basic automotive toolkit.
Can I remove the hardtop alone?
Yes, multiple proven solo removal methods exist. Success depends on physical capability, available workspace, and chosen technique. Solo removal requires more time and careful planning, but is definitely achievable. Consider your physical limitations and workspace constraints when selecting a solo method.
Will the removal damage my truck?
No, when performed correctly with proper bolt removal and electrical disconnection. The hardtop system is designed for repeated removal and reinstallation. Damage typically results from rushed procedures, improper lifting technique, or skipped preparation steps rather than inherent design flaws.
How often can I remove and reinstall the hardtop?
The system is designed for frequent use. Many owners remove their hardtops seasonally or even monthly without issues. Regular removal and reinstallation can actually help maintain bolt threads and electrical connections by preventing corrosion buildup. However, always inspect mounting points and hardware for wear during each removal.
What if I lose or damage mounting bolts?
Replacement hardware is available through Jeep dealerships or aftermarket suppliers. Document bolt specifications (length, thread pitch, head type) during removal to ensure correct replacement parts. Consider purchasing spare hardware if you remove your hardtop frequently—it’s inexpensive insurance against lost fasteners.
Final Thoughts
This comprehensive guide provides the knowledge and confidence needed for successful Jeep Gladiator hardtop removal, whether you choose traditional two-person methods or innovative solo techniques. Remember that patience and proper preparation prevent most complications, making hardtop removal an accessible maintenance task for Gladiator owners of all experience levels.