How to Mount a CB Radio in a Jeep Wrangler: Best Antenna Locations for JK, JL, TJ (2026 Guide)

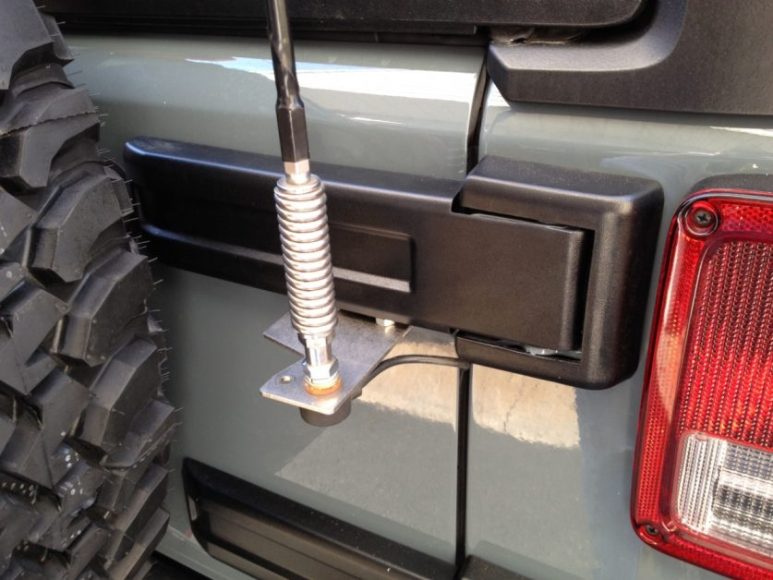
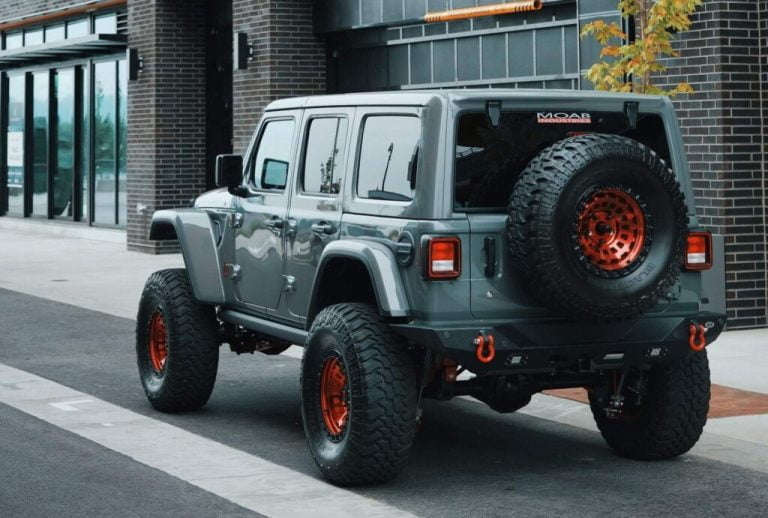
The best place to mount a CB antenna on a Jeep Wrangler is the rear spare tire carrier — it’s clean, accessible, and keeps the antenna away from trail obstacles. Front fender mounts deliver the strongest signal but take more abuse. Your cab radio unit fits best under the dash or beside the head unit.
You can complete this install in 30–60 minutes. This guide covers every Wrangler model from CJ to 2026 JL, walks through each mount location with real pros and cons, and gives you step-by-step wiring instructions that most YouTube videos skip.
Understand Your Jeep Wrangler Model and CB Basics
Not all Wranglers mount the same way. That’s the first thing most guides miss.
Each generation has different body panels, spare tire positions, and firewall access points. Getting model-specific from the start saves you from buying the wrong bracket or drilling in the wrong spot.
| Jeep Model | Years | Recommended Antenna Mount |
|---|---|---|
| CJ | 1945–1986 | Taillight or mirror |
| YJ | 1987–1995 | Taillight or fender |
| TJ | 1997–2006 | Taillight bracket |
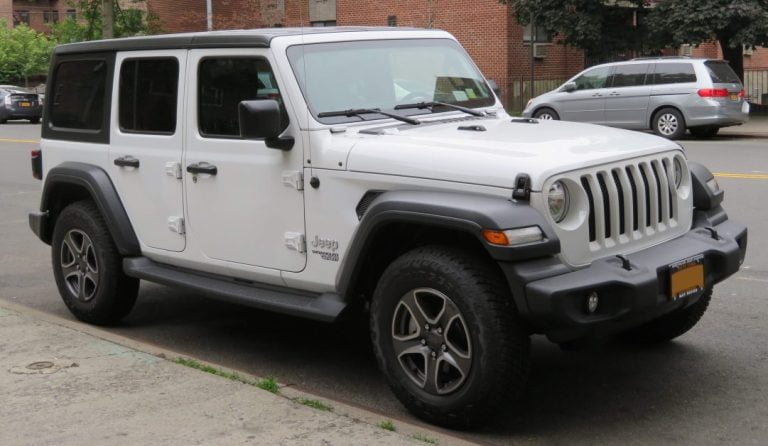
| JK | 2007–2018 | Rear spare tire or fender |
| JL | 2018–present | Rear spare tire or fender |
| Gladiator | 2020–present | Rear fender or cab corner |
One key factor: ground plane. A CB antenna needs a metal ground plane to radiate a signal efficiently. Fiberglass hardtops and soft tops don’t provide one. On older CJ and YJ models with steel bodies, this is rarely an issue. On newer JL and JK builds with modular panels, you may need a no-ground-plane antenna like a center-loaded Firestik design.
Check the JK-Forum antenna mount discussion for model-specific community recommendations before buying hardware.
Your Jeep Wrangler towing capacity setup also matters here. A rear receiver hitch and trailer wiring can create electrical interference near rear-mounted antennas — plan your cable routing to avoid those zones.
CB Components Checklist
Before you start, gather these items:
- CB radio unit (Cobra 29 LX, Uniden PRO520XL, or similar)
- Antenna (3–4 ft top-loaded, e.g., Firestik Firefly 3-4ft antenna)
- Antenna mount bracket (model-specific)
- RG-58 coax cable (18 ft minimum for most Wranglers)
- FME or PL-259 coax connectors
- SWR meter
- Drill, drill bits, zip ties, heat shrink tubing
Model-Specific Considerations
JL owners face one specific challenge. The rear spare tire carrier sits higher than older models, which affects antenna angle. Use a ball-mount adapter to angle your antenna correctly for that model.
TJ owners have it easier. The taillight housing bolts create a natural mount point — no drilling required on most setups.
Evaluate Top CB Antenna Mount Locations
There are four realistic options. Each has a clear best-use case.
Pairing the best Jeep Wrangler roof rack for soft top with a roof-mounted antenna is technically possible, but soft tops flex too much for a consistent signal. Stick to the four locations below.
If you’ve already installed the best Jeep Wrangler lift kits, note that a 3″+ lift raises your spare tire position — you may need a longer whip or an angled mount to keep the antenna above the roofline for maximum range.
Rear Spare Tire or Taillight Mount
This is the most popular choice — approximately 60% of Wrangler CB owners use some form of rear spare mount, based on forum polls across JKForum and WranglerForum.
Pros: Clean look, easy coax routing, no drilling on most JK/JL models, protected from frontal trail damage.
Cons: Antenna sits lower than the cab roofline on some builds, slight signal reduction in forward-facing direction, coax path is longer.
The Midland Jeep Wrangler antenna mount is a direct-bolt option for JK models. No cutting required.
Front Fender Mount
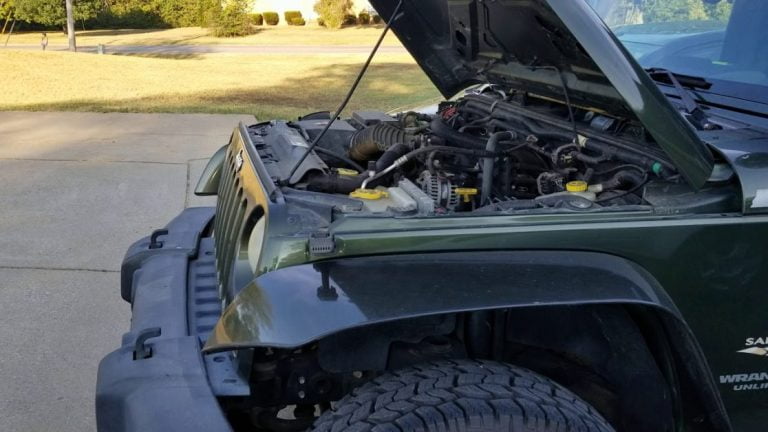
Front fenders give you the best SWR readings. Steel fenders provide a solid ground plane, and the antenna height typically clears the windshield on most builds.
Pros: Best electrical ground, SWR readings consistently under 1.5, highly visible to other trail rigs.
Cons: More vulnerable to tree branches, longer wiring run through the firewall, may interfere with windshield fold-down on JK/TJ.
Other Options: Bumper, Mirror, and Roof
Bumper mounts keep the antenna too low. Signal quality drops noticeably, and trail debris hits the coax connector constantly.
Mirror mounts work on doors-on setups but fail when you remove the doors. If you regularly take your doors off for trail runs, mirror mounts become useless fast.
Roof mounts on hardtops offer excellent height but require drilling through the headliner. They’re popular for ham radio upgrades, less common for pure CB setups.
Step 1 – Choose and Install Your Antenna Mount
Pick your location, then buy the bracket designed specifically for it. Generic mounts cause vibration and poor ground contact.
For JK and JL models, the Teraflex taillight antenna mount uses existing bolt holes on the spare tire carrier. No new holes required.
For TJ models, a taillight housing bracket bolts onto the stock taillight screws. This is a 10-minute install. Bring a Torx T15 bit.
For front fender installs, you’ll want to review Jeep Wrangler fender flares replacement OEM options first. Some aftermarket fenders already include antenna mount tabs — check compatibility before drilling.
Considering aftermarket fender upgrades? Our guide to the best Jeep Wrangler fenders covers which brands include pre-drilled antenna holes.
Installation steps for a rear spare tire mount:
- Remove the spare tire carrier bolt (rear center) using a 13mm socket
- Slide the mount bracket over the carrier arm
- Reinstall the bolt through the bracket — torque to OEM spec (usually 35–40 ft-lbs)
- Thread the antenna ball-mount into the bracket
- Connect the antenna to the ball-mount and tighten the set screw
- Test antenna stability by gently pulling in all directions before routing cable
Don’t overtighten the antenna’s set screw. Hand-tight plus a quarter turn is enough.
Step 2 – Mount the CB Radio in the Cab
The antenna gets the most attention. The radio location matters just as much.
Poor cab placement means you’re constantly reaching for the mic while crawling trails, or worse, you’ve blocked vital controls.
Most effective mounting spots:
- Under the dash (driver’s right knee area): Clean, out of sight, easy mic reach. Works on all models.
- Right of the head unit in the dash stack: Visible, professional-looking. Requires a DIN pocket or custom bracket.
- Overhead console or grab bar: Higher position for better mic reach, but can obstruct vision on JK/JL models.
- Center console top: Accessible but takes up cup holder space.
Avoid mounting anywhere near side airbag deploy zones. On JL models, the A-pillar and door frame areas are restricted.
Use a Road Pro or similar adjustable radio bracket for the most flexible positioning. These bolt to existing screws or use the dash’s existing mounting points.
If you frequently remove your doors, run the mic cable away from door-frame contact zones. Our guide on how to take Jeep Wrangler doors off shows where cables commonly snag during door removal — plan your routing around those spots.
For a full audio system upgrade alongside your CB, check out the best Jeep Wrangler radio upgrade options to plan your dash layout before drilling anything new.
Step 3 – Run Coax Cable and Wire the System
This is where most DIY installs fail. Rushed wiring creates noise, poor SWR, and eventually a dead radio.
Watch this JK CB antenna install video for a visual walkthrough of the coax routing path on a JK before you start pulling panels.
Rear spare tire mount coax routing:
- Start at the antenna base — connect the coax FME end
- Run the cable along the rear tailgate hinge channel (use split loom to protect it)
- Feed through the factory rubber grommet at the bottom of the tailgate frame
- Route along the driver’s side rocker panel interior — zip tie every 12 inches
- Enter the cab through the rear footwell grommet (behind the rear seat)
- Run forward under the carpet to the radio mount location
- Connect the PL-259 end to the radio’s SO-239 antenna port
Front fender mount coax routing:
- Run coax from the antenna down behind the inner fender liner
- Feed through the firewall using an existing rubber grommet (driver’s side, near brake master cylinder)
- Route under the dash to the radio
Keep coax away from the ignition wires and PCM harness. Proximity to those causes an alternator whine in your audio.
Power the CB from a switched 12V source. The radio requires a fused 3–5 amp circuit. Most JK/JL models have a spare blade fuse slot in the interior fuse box — use that.
Common Wiring Pitfalls
- Coax length: Don’t cut it shorter than you need. Excess coax can be coiled loosely behind the dash. Cutting and re-terminating poorly increases SWR.
- Bad ground: Connect the radio’s ground wire to bare metal, not a painted bolt. Sand any paint on the ground point.
- Unsecured coax near moving parts: Tailgate hinges chew through unprotected coax in about 200 trail miles.
Step 4 – Test, Tune, and Add Accessories
Power everything on. Don’t transmit yet.
First, check SWR. Connect your SWR meter between the coax and the radio. Transmit briefly on Channel 20 and read the forward/reflected power. An SWR reading under 1.5:1 is ideal. Under 2.0:1 is acceptable.
High SWR (above 3.0) means the antenna is too long, too short, or has a poor ground connection. Most Firestik antennas include a tip adjuster — turn it 1/4 turn at a time and recheck SWR after each adjustment.
Useful accessories to consider:
- PA speaker: Mounts under the hood or front bumper for external announcements on trails
- Power mic: Boosts voice clarity, especially with wind noise on open Wranglers
- Noise filter (inline): Reduces alternator whine on 4.0L and 3.6L engines
- Flexible antenna: 3-ft whip style flexes on low branches without breaking the mount
Legally, CB radios in the US require no license (FCC Part 95). Output power caps at 4 watts AM. Don’t modify the radio’s output power — it’s illegal and rarely improves range.
Pro Tips, Common Mistakes, and Maintenance
Here’s what experienced Wrangler CB users learn the hard way.
Use a flexible top-loaded antenna on technical trails. Rigid 4-ft antennas snap on tree branches. A 3-ft flexible Firestik or Wilson antenna bends and recovers. This matters.
Pair your CB install with solid trail protection. Best Jeep Wrangler rock rails prevent side-impact damage that can loosen your coax connections near the rocker panel routing path.
For soft-top Wranglers, consider how your best all-terrain tires for Jeep Wrangler affect antenna sway. Larger tires raise the body slightly — recheck antenna clearance above the roofline after a tire upgrade.
Common mistakes to avoid:
- Mounting on a bumper (antenna too low, constant coax damage)
- Skipping the SWR check (kills your radio’s final transistor over time)
- Using extension cables with mismatched connectors (increases signal loss)
- Running coax over sharp metal edges without split loom protection
- Forgetting to weatherproof the antenna connection (oxidation kills the signal within one season)
Weatherproof all outdoor connections with self-amalgamating tape. Do this every season, especially after trail runs in mud or water crossings.
Frequently Asked Questions
Is a rear spare tire mount or a front fender mount better for the signal?
Front fender mounts win on raw SWR performance and signal clarity. Rear spare mounts win on convenience and aesthetics. For casual trail use, rear is fine. For long-range communication, go front.
What’s the best CB antenna for a JL Wrangler?
The Firestik Firefly (3 or 4 ft) handles no-ground-plane installs well and fits JL spare tire carrier mounts cleanly.
How long does this install take?
Plan 45–60 minutes for a rear spare tire mount with basic wiring. A front fender mount with firewall routing takes 90–120 minutes for most DIYers.
What SWR reading should I aim for?
Below 1.5:1 is ideal. Below 2.0:1 is usable. Above 3.0:1 will damage your radio transmitter over time.
Do I need an FCC license for a CB radio?
No. CB radios operate license-free under FCC Part 95 rules in the United States.
Conclusion
A rear spare tire mount with a Firestik flexible antenna is the right starting point for most Wrangler owners. It’s quick, clean, and doesn’t require drilling. Front fender mounts deliver better performance for those who need reliable long-range comms on trails or overlanding trips.
Follow the four steps: pick your mount location, install the bracket, seat the radio in the cab, then run and tune your coax. Check SWR before every trail season.
For most Wrangler owners, the Midland or Teraflex rear spare setup with a 3-ft Firestik antenna covers 95% of real-world CB needs. Start there, tune your SWR, and add accessories as you learn the system.