How to Jump Start a Mini Cooper Safely: StepbyStep Guide
Imagine this: you’re sitting inside your Mini Cooper, ready to hit the open road, when suddenly鈥?silence. Your beloved Mini refuses to start, leaving you feeling stranded and frustrated.
But fear not, because the solution is simpler than you think. In this guide, we’ll reveal the secret to jump starting your Mini Cooper and getting back on track.
Whether you’re a seasoned driver or a novice in need of assistance, we’ve got you covered. So, grab your jumper cables, find a running vehicle, and prepare to bring your Mini back to life.
Get ready to discover the essential steps to reviving your car’s battery.
how to jump start a mini cooper
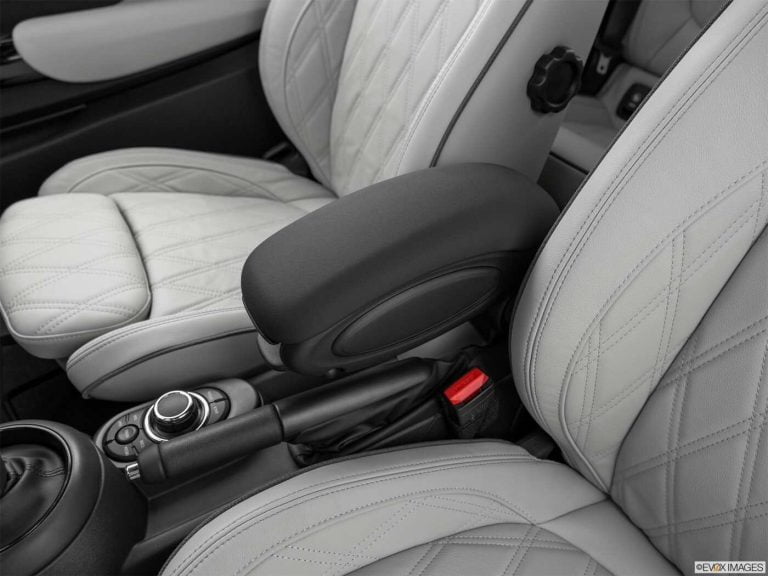
To jump start a Mini Cooper (2014-present), you will need jumper cables and another running vehicle. First, locate the battery and jump points on the Mini Cooper, which include a positive terminal covered by a red cap and a negative ground to the right of the battery.
Connect the positive cable from the helper car’s battery terminal to the Mini’s positive jump point, and attach the negative cable to the helper car’s battery and the Mini’s black ground point. Start the helper car and let it run for a few minutes, occasionally revving the engine to ensure maximum charge transfer.
If the Mini Cooper doesn’t start immediately but shows signs of trying, leave the jumpers on for a bit longer. Once the Mini is started, remove the jump cables while keeping the car running.
It is recommended to drive the car to further charge the battery. Finally, have the battery’s voltage tested and consider replacement after jump starting the Mini Cooper.
Key Points:
- Gather jumper cables and another running vehicle
- Locate the battery and jump points on the Mini Cooper
- Connect the positive cable from the helper car’s battery to the Mini’s positive jump point
- Attach the negative cable to the helper car’s battery and the Mini’s black ground point
- Start the helper car and let it run for a few minutes
- Remove the jump cables while keeping the car running
Sources
https://www.northamericanmotoring.com/how-tos/a/mini-cooper-2014-present-how-to-jump-start-battery-431962
https://www.youtube.com/watch?v=dYW6wDd4_oU
https://www.youtube.com/watch?v=ZGR36kstnvU
https://www.youtube.com/watch?v=P1HXNG8-ncE
Check this out:
💡 Pro Tips:
1. Before attempting to jump-start your Mini Cooper, ensure that both vehicles are turned off and in park. This will help prevent any accidental damage or injury while connecting the jumper cables.
2. Check the condition of the jumper cables before using them. Ensure that there are no frayed wires or exposed metal, as this can pose a safety hazard.
3. If you’re jump-starting your Mini Cooper in a busy or potentially dangerous location, such as on a busy road, it’s a good idea to turn on your hazard lights to alert other drivers to your presence.
4. If your Mini Cooper still doesn’t start after jump-starting, it may be a sign of a deeper issue with the electrical system. In this case, it’s recommended to have a professional mechanic inspect your vehicle.
5. To avoid any potential damage to the electrical system, be cautious when disconnecting the jumper cables. Remove the negative cable from the Mini Cooper first, followed by the positive cable.
Identifying The Issue: Reasons For A Flat Battery In A Mini Cooper
When your Mini Cooper experiences a flat battery, it is essential to understand the underlying causes. A flat battery can occur due to various reasons associated with the battery or alternator.
These electrical issues can result from leaving the lights on, a faulty alternator, or an old or damaged battery. It is crucial to identify the cause to prevent future occurrences and address any underlying problems.
Locating The Battery And Jump Points In A Mini Cooper
To jump start a Mini Cooper, you first need to locate the battery and the corresponding jump points. In most Mini Cooper models from 2014 to the present, you can find the battery located in the engine compartment.
It is essential to ensure that both vehicles are turned off before proceeding.
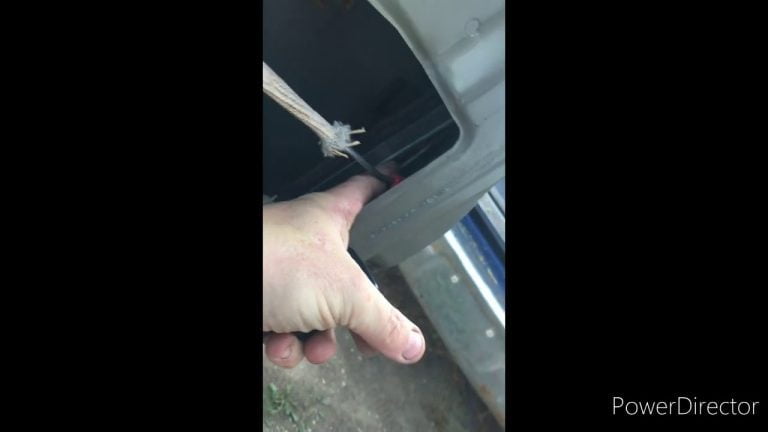
To locate the jump points, look for a red cap covering the positive terminal of the Mini Cooper’s battery. This is where you will connect the positive cable of the jumper cables.
The negative cable will be attached to the ground point, which is typically located to the right of the battery. Having a clear understanding of the battery’s location and jump points will make the process much smoother.
Step-By-Step Guide: Connecting The Jumper Cables
Now that you have located the battery and jump points, you can begin connecting the jumper cables. It is crucial to ensure safety throughout the process.
Follow these step-by-step instructions to jump start your Mini Cooper:
Position the helper car with the running engine close to your Mini Cooper, leaving enough space between the two vehicles but ensuring the jumper cables can reach both batteries.
Attach the positive cable (usually red) to the positive terminal of the helper car’s battery.
Make sure the connection is secure.
- Connect the other end of the positive cable to the positive jump point on your Mini Cooper, which is covered by the red cap.
Ensure a tight connection.
Attach the negative cable (usually black) to the negative terminal of the helper car’s battery.
Connect the other end of the negative cable to the black ground point on your Mini Cooper, which is located to the right of the battery.
Double-check all connections to ensure they are secure and properly attached.
Revving The Engine: Maximizing Charge Transfer
After the cables are connected, it’s time to start reviving the flat battery. Start the engine of the helper car and let it run for a few minutes.
Occasionally revving the engine will help transfer the maximum amount of charge to your Mini Cooper’s battery. This step is crucial in ensuring that the battery gains enough power to start the car.
Patience Pays Off: Troubleshooting If The Mini Cooper Won’t Start Immediately
In some cases, the Mini Cooper may not start immediately, even after following the proper jump start procedure. If this happens, it is essential to be patient and allow the battery to charge for a bit longer.
Leave the jumper cables connected and continue running the helper car for a few more minutes. Sometimes, a flat battery takes a little longer to regain enough power to start the car.
However, if the Mini Cooper continues to show no sign of starting after an extended period, it may be necessary to seek professional assistance.
After Jump Starting: Battery Testing And Replacement Considerations
Once your Mini Cooper has successfully started, it is crucial to take a few additional steps. While driving the car will further charge the battery, it is essential to have the battery’s voltage tested.
This will help determine if the battery is still in good condition or if it requires replacement. If the battery consistently fails to hold a charge or has been jump-started multiple times, it is advisable to consider replacing it with a new one.
Taking these precautions and following the step-by-step guide will help you safely jump start your Mini Cooper. Remember to prioritize safety by ensuring proper connections and not rushing through the process.
Additionally, regular battery maintenance and being aware of the underlying causes of a flat battery can help extend its lifespan and prevent future issues.