Can You Add Power Locks to a Jeep Wrangler? Complete Installation Guide

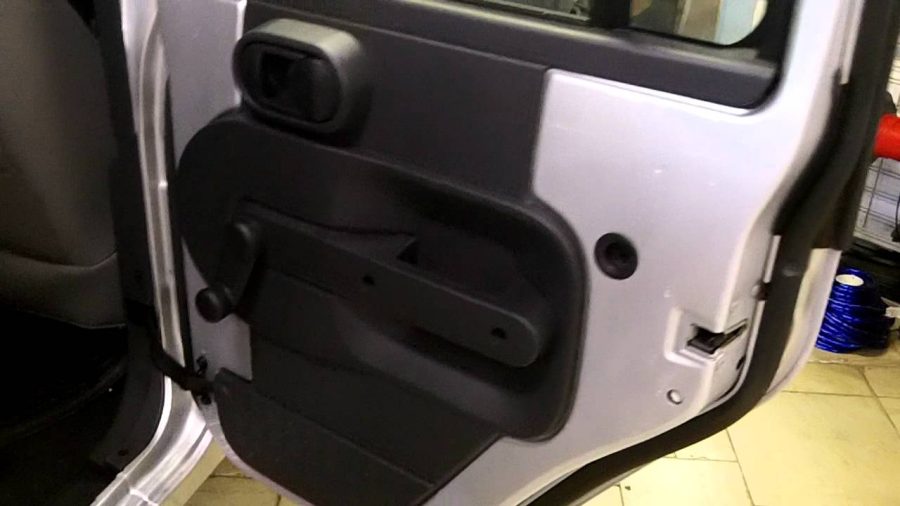
Yes, you can add power locks to any Jeep Wrangler model. Aftermarket power lock systems transform manual door locks into automatic, remote-controlled systems using 12-volt electric actuators and a control module.
How Power Locks Work
A 12-volt electric motor drives a small geartrain inside each actuator. When you press the lock or unlock button, the motor rotates the actuating arm, which moves the door latch up to lock and down to unlock.
The system contains four core components: power lock actuators (one per door), a relay control module, a keyless entry receiver, and the wiring harness. Built-in safety devices prevent motor damage from overcycling—they cut power if someone repeatedly locks and unlocks without releasing the button.
Two system types exist. Complete kits include new door latches that mount only with the actuators, offering superior reliability but requiring more disassembly. Retrofit systems mount actuators to existing latches, reducing installation complexity and costs. Most owners choose complete kits for their durability.
Which Jeep Models Accept Power Locks
JK Wranglers (2007-2018) have the widest kit selection. A1 Electric, Electric-Life, and Autolöc all offer two-door and four-door solutions for this generation.
JL Wranglers (2018-present) require JL-specific kits. The JL platform redesigned door latch geometry, making JK kits incompatible. JL-specific kits account for these structural differences.
JT Gladiators share identical door assemblies with JL Unlimited models. JL four-door kits install directly without modification.
TJ Wranglers (1997-2006) have fewer factory kit options. Some owners use salvaged components from other vehicles or construct custom relay-based solutions.
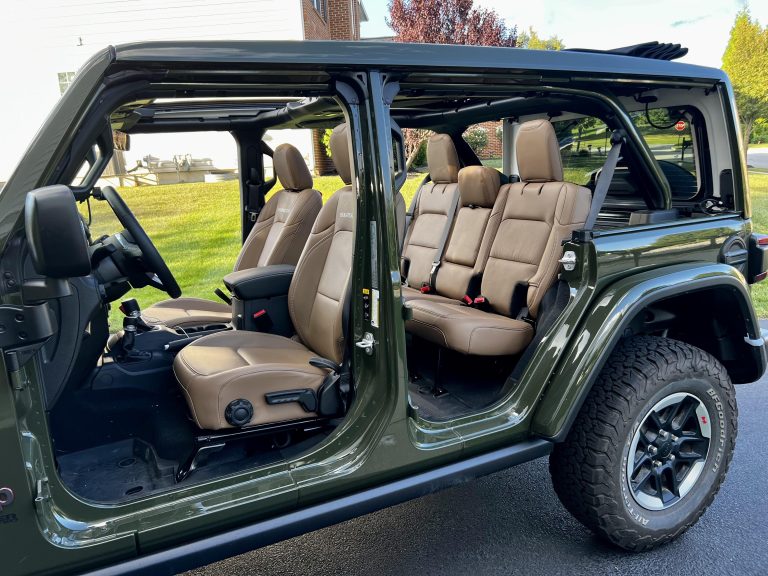
Door configuration matters significantly. Two-door installations are complete in 4-6 hours for experienced installers. Four-door installations require accessing rear door latches—a considerably more demanding task that takes 8-10 hours. Rear latches sit in tight spaces, making removal frustrating for most users.
Power Lock Kit Options and Pricing
A1 Electric Power Lock Kits lead the Jeep market. Two-door systems cost $395, while four-door kits run $475-$495. Kits include pre-formed linkage rods with precise bends for each door position. Provided templates eliminate guessing when drilling actuator mounting holes.
Quick-disconnect wiring connections at each door reduce splice points. Many installers praise the included step-by-step instructions and responsive technical support.
The keyless entry option adds $100-$150 to the base price. Most include an Avital remote receiver compact enough to hide beneath the dashboard. Some users successfully program these remotes to factory Jeep key fobs, eliminating separate remotes.
Electric-Life MES systems cost similarly ($395-$475). Their Swiss-manufactured components emphasize premium materials and construction standards. They use central locking modules requiring no switch modifications.
Autolöc offers budget two-door solutions starting around $200-$300 before keyless entry. Installation documentation is less comprehensive, and technical support relies more on YouTube research. Mechanically experienced owners find them excellent value; beginners may struggle with unclear instructions.
Relay upgrade kits ($100-$150) provide a different approach for Wranglers with factory power locks that operate sluggishly. A relay boosts power to existing actuators, dramatically improving lock speed and force. Installation takes 30 minutes with no door disassembly required—simply connect wires to the battery and door lock circuit.
Installation Tools You’ll Need
Gather these tools before starting:
- Torx bits (T15, T20, T30)
- 10mm socket
- Needle-nose pliers
- Wire stripper and cutter
- Auto trim removal tools
- Power drill with appropriate bits
- Punch tool for marking holes
- Screwdrivers (Phillips and flathead)
Trim removal tools prevent cracking door panels during removal. A broken clip costs far more than a $10-15 tool investment. Wire crimpers or heat-gun-compatible crimping tools create secure electrical connections.
Step-by-Step Installation Process
Remove the door panels. Pop off plastic covers around door handles to access hidden screws. Remove four Phillips-head screws holding the panel, then carefully pry the panel away using a trim tool. Disconnect the window crank by finding its C-clip retainer.
Access the door mechanism. The inner carrier panel slides out after removing the 10mm bolts. This assembly houses the window regulator and door handle. Unclip the window glass from its track before fully removing the carrier panel. Take photos during disassembly to guide reassembly.
Remove the door latch. Three Torx fasteners secure the factory latch. Gently wiggle and pull the latch assembly out. Sometimes latches bind on mounting brackets—use shims (thin metal pieces) hammered underneath to release them. Rushing this step risks breaking latch components.
Install the actuator. Use the provided templates to mark actuator mounting holes on the inner door. Temporarily bolt the template down with mounting screws before drilling. A 5/32-inch drill bit creates holes at marked positions. Install the power lock actuator and torque the screws securely. Confirm the actuator moves freely without binding.
Connect the linkage rod. Connect the pre-formed rod between the latch assembly and actuator. The rod must seat firmly into the latch without forcing or bending. Feed the rod hook into the actuator’s arm, ensuring the connection snaps completely. Test the mechanism manually, confirming the rod moves freely without interfering with door handles or windows.
Route the wiring. Feed the power wire through the door loom alongside existing wiring. Run red wires for positive and black wires for ground using 18-20 gauge automotive wire. Keep wires organized with zip ties, ensuring slack at door hinges so the wire never experiences tension when doors open fully. Electrical tape secures loose sections.
Mount the control module. Mount the relay module under the steering column or beneath the dashboard. Avital receivers measure approximately 3 inches and hide easily in dashboard cavities or glove box areas. Run positive power through a 10-amp fuse holder directly to the battery. Ground to a clean, unpainted metal surface.
Test before reassembly. Verify the system operates before closing door panels. Testing now prevents reopening everything if something malfunctions.
Complete all doors. Repeat this process for the remaining doors. Four-door installations require 8-10 hours for first-timers. Experienced installers finish in 4-6 hours. A helper makes panel removal faster and prevents component damage.
Professional Installation Costs
Dealerships charge $1,600-$2,000 total for power locks. Labor consumes $600-$900, with remaining costs covering factory-style components. Dealerships refuse customer-supplied kits and insist on dealership parts.
Independent electronics shops quote $550-$900 total using aftermarket A1 Electric or similar kits. These shops complete jobs in 6-8 hours and typically offer one-year warranties on parts and labor. Getting multiple quotes often reveals $200-$400 differences based on specific experience with Wranglers.
Car audio and alarm specialists frequently offer excellent rates because power locks fit within their expertise. Expect $200-$300 in labor at these shops—significantly less than dealerships. They possess the crimping and testing equipment necessary for professional results.
Common Installation Mistakes
Force removal of door latches causes bent components and broken mounting brackets. Take time identifying every bolt—some hide under plastic or beneath window regulators. Stop and recheck if a latch refuses to budge rather than forcing it.
Improper actuator positioning creates poor mechanical advantage, causing sluggish operation or strange grinding sounds. Always use the provided templates without deviation. These engineer optimal angles for both lock operation and cable routing.
Poor electrical connections cause intermittent failures days or weeks after installation. Crimp connectors properly and solder connections whenever possible. Never rely on wire nuts for automotive wiring. Test every connection under tension before finalizing.
Inadequate wire routing allows wires to contact door hinges, window mechanisms, or handles. Secure every wire with zip ties at 6-8 inch intervals. Run wires above moving components. Test full door operation repeatedly during installation.
Insufficient slack at hinges creates tension that breaks wires or connectors. Leave 3-4 inches of loose wire at the door body connections to allow full hinge articulation.
Using panel removal by hand instead of trim tools cracks plastic, requiring expensive panel replacement ($100-$200). A $12 trim tool prevents costly mistakes.
Integrating With Your Key Fob
Most aftermarket kits function as independent systems through dedicated remotes. However, some advanced options integrate with your factory Jeep key fob, eliminating separate remotes. This requires custom wiring that taps into your vehicle’s existing keyless entry system.
Several owners report successfully programming Avital remotes to their factory Jeep fobs. This involves inputting specific codes through the remote interface—consult the kit documentation or model-specific YouTube tutorials. Success rates vary across fob types.
Future-focused owners should request kits with “programmable receiver modules” rather than fixed-code systems. Modern remotes with rolling code security represent current standards. Reprogrammable modules maintain compatibility better than permanently coded units as vehicle systems evolve.
Troubleshooting After Installation
Slow or weak locking/unlocking indicates insufficient electrical power reaching the actuators. Verify battery voltage during operation—it should exceed 12 volts. Check all ground connections for corrosion. Undersized wiring causes a voltage drop. Running separate direct power and ground wires from the battery, rather than using existing circuits, often solves weak operation.
One door not responding points to a disconnected or failing actuator. Verify that all connectors seat fully. Directly apply 12-volt power to the suspect actuator’s terminals—it should move in both directions. No response indicates a burned-out actuator requiring replacement.
Intermittent operation suggests loose connections or corroded terminals. Disconnect and reconnect all mated connectors firmly. Moisture inside connectors causes corrosion.
Grinding or unusual noises during lock operation indicate an incorrect mechanical setup. Verify the linkage rod sits fully in the latch without binding. Misaligned rods create friction, producing grinding sounds. Removing and repositioning the rod typically resolves this.
DIY Versus Professional Installation
The DIY path saves $300-$900 in labor. Owners comfortable removing door panels and working with basic electrical connections find the installation manageable. YouTube videos from successful installers provide visual reference for tricky steps.
Complex wiring takes significantly longer than quoted timelines on first attempts. Broken clips during panel removal become frustrating. If you lack a drill or trim tools, purchasing these reduces savings.
Mistakes in door reassembly cause wind noise, water leaks, or rattles—issues requiring professional diagnosis. Professional installers know where problems occur and prevent them during installation. For owners valuing time or uncomfortable with electrical work, professional installation delivers value.
The DIY decision depends on three factors: mechanical comfort level, available time, and local labor costs.
Final Recommendation
Power locks dramatically improve daily Wrangler ownership, especially on four-door models where manually locking rear doors proves frustrating. The system typically operates flawlessly for years with zero maintenance. Parts replacement costs remain reasonable if actuators eventually fail.
Budget-conscious owners with weekend availability find that A1 Electric kits offer the best quality-to-price ratio. Those prioritizing professional installation should contact local security and audio specialists rather than dealerships—accessing quality work at half the dealership cost.
Either path transforms your Wrangler’s daily usability significantly.