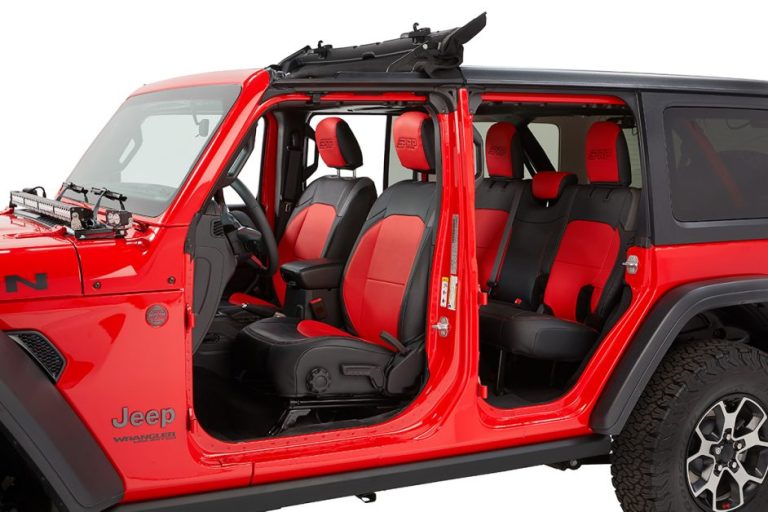
Jeep Wrangler Jacking Points: Safe Locations & Step-by-Step Guide

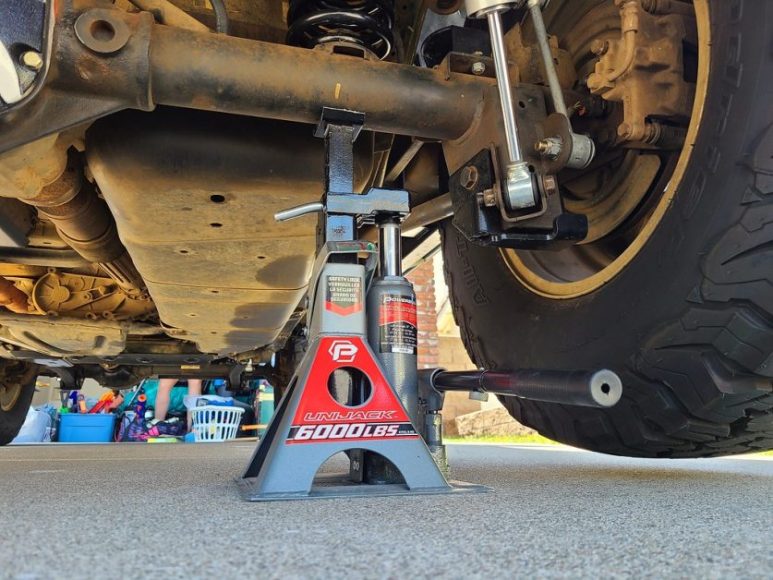
Knowing where to safely place a jack on your Jeep Wrangler prevents costly damage and serious injury. The primary jacking points are the front and rear axle tubes near the differential, though frame rails work for certain lifting scenarios. Using the wrong location can bend components, cause instability, or lead to catastrophic jack failure while you’re underneath the vehicle.
Why Proper Jack Placement Matters
Incorrect jack placement damages critical suspension components and creates life-threatening instability. Wranglers feature solid front and rear axles that handle vertical loads exceptionally well, unlike unibody vehicles, where pinch welds serve as jacking points. Placing a jack on control arms, differential covers without protection, or weak frame sections bends metal and compromises structural integrity.
The Wrangler’s solid-axle design actually simplifies jacking compared to independent suspension vehicles. Axle tubes are thick steel cylinders engineered to support the vehicle’s 4,000-5,000 pound curb weight. Factory service manuals specify axle tubes as primary jacking locations for tire changes and maintenance work.
Safety risks multiply when jacking on unstable ground or skipping jack stands. A floor jack alone can fail from hydraulic leaks or accidental release valve contact. Always use properly rated jack stands positioned on the axle tubes for redundant safety.
Tools Needed for Jacking Your Wrangler
The factory jack stores in the rear cargo area under the load floor on JK and JL models. This bottle-style jack suffices for roadside tire changes but lacks the stability and speed of a quality floor jack. A 3-ton hydraulic floor jack handles Wrangler curb weights with a comfortable safety margin and lifts faster than mechanical jacks.
Jack stands rated for 3 tons minimum are non-negotiable for any work requiring you to go under the vehicle. Position stands under axle tubes close to where the jack initially lifted, ensuring stable weight distribution. Wheel chocks placed on the opposite axle prevent rolling during the lift process, which is particularly important when working on off-road terrain.
The factory lug wrench assembles from components stored with the jack. Many owners upgrade to a four-way lug wrench or impact-rated sockets for faster wheel removal. For those looking to enhance their Wrangler setup, consider exploring best Jeep Wrangler accessories to streamline maintenance tasks.
Front Jacking Points on Jeep Wrangler
The front axle tube serves as the primary front jacking point, specifically the section between the differential and the wheel hub. Position your floor jack’s saddle on the axle tube approximately 6-8 inches from the differential pumpkin toward the tire you’re changing. This location provides stable contact and keeps the jack clear of steering components.
For lifting both front wheels simultaneously, center the floor jack directly under the front differential housing. The diff’s cast iron construction handles concentrated loads without damage. Engage the parking brake and chock the rear wheels before lifting to prevent rearward rolling.
Avoid jacking on the front crossmember or control arms unless you’re using a transmission jack with wide load distribution. Control arms bend easily under point loads, and crossmember contact points vary between model differences in JK, JL, and TJ Wranglers. The axle tube remains consistent across all generations.
JL-Specific Considerations
JL Wranglers (2018-present) use the same axle jacking points as previous generations, but aluminum body panels reduce overall weight slightly. The thinner JL frame rails require more caution if frame jacking becomes necessary. Stick with axle tubes for maximum safety and compatibility across aftermarket jack equipment.
Common Front Jacking Errors
Never jack on the front differential cover itself unless using a specialized diff guard designed for jacking. The thin stamped steel cover dents easily and can crack cast aluminum housings on Rubicon models. Similarly, avoid placing jacks on brake components, tie rod ends, or track bar mounts, as these can compromise vehicle safety systems.
Rear Jacking Points Explained
Rear axle tubes mirror front jacking procedures. Position the floor jack on the axle tube 6-8 inches from the differential toward the tire needing service. The rear axle tube handles identical loads to the front and provides equally stable jacking surface.
Lifting both rear wheels requires centering the jack under the rear differential. The rear diff construction matches the front unit’s durability. Chock front wheels and verify the parking brake is engaged before raising the rear axle.
Jack stand placement matters more on the rear axle because of the Wrangler’s longer wheelbase. Position stands on the axle tubes near the shock mounts for optimal stability. This spacing prevents the vehicle from pivoting on stands during wheel work.
Using the Rear Diff Safely
Dana 44 and Dana 35 differentials found in Wranglers tolerate jacking loads on the housing itself, not the thin cover. If you must jack from the diff, ensure contact occurs on the thick cast housing body. Aftermarket diff covers with built-in jack points eliminate concerns about crushing factory covers and are popular among enthusiasts performing frequent maintenance.
Step-by-Step Jacking Procedure
Park on level concrete or asphalt whenever possible. Soft ground, like dirt or gravel, causes jacks to sink and creates instability. Engage the parking brake and shift the transmission into first gear for manual transmissions or Park for automatics.
Place wheel chocks on the axle opposite your jacking point. If lifting the front, chock both rear wheels. If lifting the rear, chock both front wheels. This prevents the vehicle from rolling off the jack during the lift sequence.
Position the floor jack under the selected axle tube, ensuring the saddle contacts the axle squarely. Pump the jack handle while watching the contact point until the tire lifts just clear of the ground. Minimum lift height reduces instability risk while providing adequate clearance for wheel removal.
Immediately slide the jack stands under the axle tube on both sides of your jacking point. Lower the vehicle onto the stands slowly, verifying stable contact before fully releasing jack pressure. Leave the floor jack in place as backup support, but not bearing the vehicle’s full weight.
Full Vehicle Lift Sequence
Lifting all four wheels requires jacking one axle completely, securing it on stands, then repeating for the second axle. Start with the rear axle to prevent the parking brake from interfering. Once rear stands are set, move to the front axle and repeat the process. For those undertaking more extensive modifications, understanding how to lift a Jeep Wrangler can help budget for proper equipment and professional installation.
Single Corner Tire Change
For simple tire changes, jack the single corner until the wheel clears the ground by 1-2 inches. This minimal lift provides enough clearance for tire removal while maintaining maximum stability. Skip jack stands for quick tire swaps if you’re not going under the vehicle, but always use them for any extended work period.
Model Differences: JK, JL, TJ
Jacking points remain remarkably consistent across Wrangler generations. TJ models (1997-2006) use identical axle tube jacking locations as newer JK (2007-2018) and JL (2018-present) generations. The main differences appear in the jack storage locations and included tools.
TJ Wranglers store the factory jack under the rear passenger seat rather than the cargo floor. JK models moved the jack storage to a compartment in the cargo area. JL Wranglers continue the cargo area storage but use a redesigned jack kit with improved instructions.
Frame rail jacking on TJ models uses more substantial steel frames than the aluminum-reinforced JL frames. If you must jack from frame rails, TJ and JK models tolerate frame contact better than JLs. For buyers considering different generations, researching what are the best years for Jeep Wranglers can help identify models with the most robust construction.
| Model | Front Point | Rear Point | Jack Storage |
|---|---|---|---|
| TJ (1997-2006) | Front axle tube | Rear axle tube | Under rear seat |
| JK (2007-2018) | Front axle tube | Rear axle tube | Cargo area floor |
| JL (2018-present) | Front axle tube | Rear axle tube | Cargo area floor |
Common Mistakes and Safety Tips
Never jack on control arms regardless of how sturdy they appear. These stamped steel arms bend under concentrated jack loads, requiring expensive replacement. The coil spring perches on the control arms can crack welds when used as jacking points.
Avoid using only a floor jack for extended work periods. Hydraulic jacks can fail due to seal leaks or accidental release valve contact. Always pair floor jacks with properly rated jack stands positioned on the axle tubes for redundant safety protection.
Skip jacking on sloped driveways or soft ground. Even slight inclines create lateral forces that cause jacks to slip. If you must work on uneven surfaces, use jack pads or wide base plates to distribute weight and prevent sinking. Understanding how safe is a Jeep Wrangler includes proper maintenance procedures that protect both you and your investment.
FAQs
Can I jack my Wrangler from the frame rails?
Frame rails work as secondary jacking points but require careful positioning. JK frames tolerate frame contact better than JL aluminum-reinforced frames. Use wide jack saddles or frame rail adapters to distribute loads evenly. Axle tubes remain the preferred primary jacking location for all models due to superior stability.
What size floor jack do I need?
A 3-ton hydraulic floor jack handles all Wrangler models comfortably. Two-door Sport models weigh around 4,000 pounds while four-door Rubicon Unlimited models approach 5,000 pounds. The 3-ton rating provides an adequate safety margin for standard vehicles. Verify lift height accommodates lifted suspensions if you’ve added modifications.
Should I jack on the differential itself?
You can jack on the differential housing, not the thin cover. The cast iron housing tolerates concentrated loads without damage. However, axle tubes offer better stability because the round tube shape centers automatically in most jack saddles. Use the diff when you need to lift both wheels on one axle simultaneously, ensuring proper contact on the housing body rather than the vulnerable cover.