How to Fix Mini Cooper Misfire Cylinder 2 (P0302 Code)

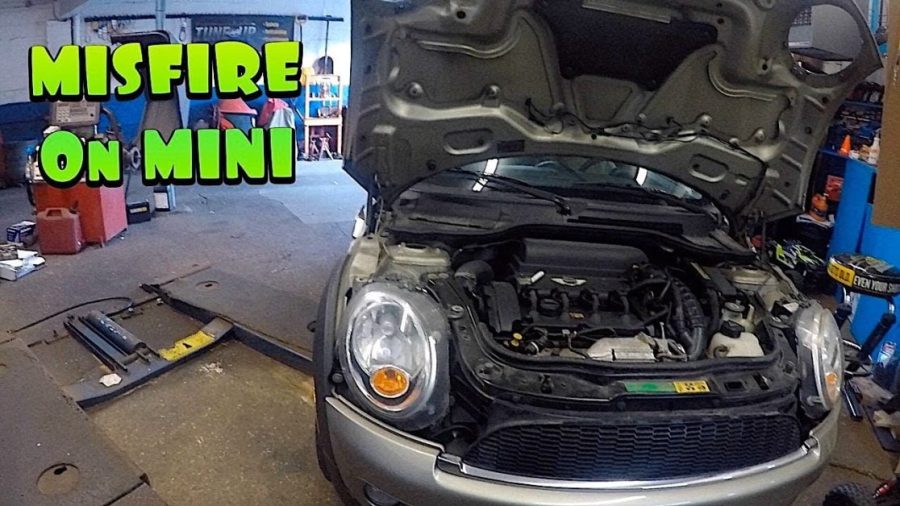
Your Mini Cooper is running rough, and the check engine light just came on. The OBD2 scanner shows a P0302 code – cylinder 2 misfire detected. Don’t panic. This is one of the most common issues Mini owners face, especially with R56 models.
Most P0302 misfires stem from faulty ignition coils or worn spark plugs. The good news? You can diagnose and fix this problem yourself in about 30 minutes with basic tools. This guide walks you through each step to get your Mini running smoothly again.
A cylinder 2 misfire means the fuel-air mixture isn’t burning properly in that cylinder. You’ll notice rough idling, reduced power, and poor fuel economy. Some drivers experience limp mode activation on highway speeds.
Before starting, gather these essential tools: best OBD2 scanner for Mini Cooper, 14mm 12-point socket, Torx T25 and T30 bits, and spark plug gap tool. Always work with a cool engine for safety.
Understand Cylinder 2 Misfire Symptoms and Causes
The P0302 diagnostic trouble code specifically indicates misfiring in cylinder 2. Your Mini’s engine control unit detects this through crankshaft position sensors. When cylinder 2 fails to fire properly, it creates a distinctive rough running condition.
Common symptoms include engine shaking at idle, hesitation during acceleration, and reduced fuel efficiency. Many owners report their Mini entering limp mode suddenly. The check engine light may flash during heavy acceleration.
Several components can cause cylinder 2 misfires in Mini Coopers. Ignition coils fail most frequently, especially in 2007-2013 R56 models. Worn spark plugs rank second, followed by fuel injector problems. ECU failures, though less common, can target specific cylinders.
The Mini Cooper R56 1.6L engine uses individual coil-on-plug ignition systems. Each cylinder has its own coil pack mounted directly above the spark plug. This design makes diagnosis easier through coil swapping tests.
Firing Order Reference
Understanding your Mini’s firing order helps during diagnosis. The R56 engines fire in sequence: 1-3-4-2. Cylinder 1 sits at the front (timing chain end), while cylinder 4 is at the rear. Cylinder 2 occupies the second position from the front.
Poor maintenance often triggers multiple cylinder misfires simultaneously. If you see P0301, P0303, or P0304 codes alongside P0302, suspect fuel quality issues or timing problems. Single-cylinder codes usually point to ignition components.
Are Mini Coopers expensive to maintain and repair? Concerns often arise with misfire codes. DIY repairs significantly reduce costs compared to dealer service.
Gather Tools and Scan for Codes
Start by connecting your OBD2 scanner to the diagnostic port. It’s located under the dashboard on the driver’s side. Turn the ignition to position II (all lights on, engine off).
Read all stored codes, not just P0302. Write down any additional codes like P0300 (random misfire) or fuel system codes. Clear the codes temporarily to see if P0302 returns immediately.
Check live data if your scanner supports it. Monitor cylinder misfire counters while the engine idles. Cylinder 2 should show significantly higher misfire counts than the others.
Essential tools include a 14mm 12-point socket for spark plugs and Torx bits for engine cover removal. A spark plug gap gauge ensures proper installation. A basic multimeter helps test coil resistance if needed.
Best Scanner Features
Look for scanners that display real-time misfire data. This feature helps confirm repairs immediately after completing work. Some models show graphical cylinder performance comparisons.
Professional-grade scanners offer component activation tests. These can trigger individual coil packs to verify proper operation. However, basic code readers suffice for most DIY diagnostics.
Step 1: Inspect and Swap Ignition Coils
Remove the plastic engine cover using Torx T25 screws. The cover lifts straight up after removing three screws. Set it aside in a clean area.
Locate cylinder 2’s ignition coil – it’s the second coil from the front timing chain end. Disconnect the electrical connector by pressing the release tab. Pull straight up to avoid damage.
Remove the coil by pulling firmly upward with a slight twisting motion. Modern Mini coils don’t use bolts for retention. The coil should slide out smoothly once the connector is removed.
Inspect the coil for obvious damage like cracks or oil contamination. Check the rubber boot for tears that allow moisture intrusion. A damaged boot often causes intermittent misfires.
Key swap test: Move cylinder 2’s coil to cylinder 1 or 3. Install a known-good coil in cylinder 2’s position. This simple test isolates coil failures definitively.
Start the engine and let it idle for two minutes. Clear codes and drive normally for several miles. If misfires move to the new cylinder location, the coil is faulty.
While accessing coils, consider checking your best air filter for Mini Cooper S R56 for maintenance efficiency. A dirty filter can worsen misfire symptoms.
Common mistakes to avoid: Never force coils into spark plug wells. Cross-threading damages expensive cylinder heads. Always hand-thread spark plugs initially before using tools.
Purchase quality replacement coils from reputable suppliers. Cheap aftermarket coils often fail prematurely under Mini’s high-pressure fuel system demands. OEM Bosch coils provide the longest service life.
When installing new coils, apply thin dielectric grease to the rubber boots. This prevents moisture intrusion and simplifies future removal. Avoid getting grease on electrical contacts.
Step 2: Check and Replace Spark Plugs
Remove the spark plug from cylinder 2 using your 14mm 12-point socket. Turn counterclockwise slowly to prevent cross-threading. Mini Cooper engines use aluminum heads that are easily damaged.
Inspect the removed plug’s condition carefully. Normal plugs show light brown deposits on electrodes. Black sooty deposits indicate a rich fuel mixture or oil burning. White deposits suggest lean conditions or overheating.
Measure the gap on replacement plugs using a gap gauge. Mini Cooper R56 engines require 0.028-0.032 inch gaps for optimal performance. Never assume new plugs are gapped correctly from the factory.
Gap adjustment technique: Use only gap tools designed for precious metal electrodes. Bend the ground electrode carefully to achieve proper spacing. Avoid touching the center electrode.
Thread the new plug by hand initially. This prevents cross-threading that ruins expensive cylinder heads. Once hand-tight, use the socket to tighten to specification.
Torque spark plugs to 18-22 ft-lbs maximum. Over-tightening crushes the sealing washer and can crack porcelain insulators. Under-tightening allows combustion leaks.
Expected outcome: Fresh plugs should eliminate misfires caused by worn electrodes. Start the engine and listen for smooth idle quality. Rough idling may indicate other issues.
Install remaining plugs using identical procedures. Replace all plugs simultaneously for even performance. Mixing old and new plugs creates uneven combustion characteristics.
Common installation mistakes: Dropping plug tips damages electrodes beyond repair. Use magnetic tools or careful handling during installation. Keep plug wells clean of debris.
Consider upgrading to platinum or iridium plugs for longer service life. These premium materials resist electrode wear better than copper cores. Extended maintenance intervals offset higher initial costs.
Monitor engine performance for several hundred miles after plug replacement. Some computers require adaptation time for optimal fuel mapping. Performance should improve gradually as systems adapt.
Step 3: Test Fuel Injectors and Wiring
If coil and plug replacement doesn’t resolve misfires, suspect fuel system problems. Cylinder 2’s injector may be clogged or electrically faulty. Injector problems often cause lean misfires under load.
Injector swap test: Similar to coil testing, swap cylinder 2’s injector with another cylinder. This requires removing the fuel rail assembly. Exercise extreme caution around pressurized fuel systems.
Relieve fuel pressure before disconnecting injectors. Remove the fuel pump fuse and crank the engine briefly. This purges residual pressure from the fuel rail safely.
Disconnect injector electrical connectors and fuel rail mounting bolts. The rail lifts out with injectors attached. Mark injector positions before removal to ensure proper reinstallation.
Electrical testing: Measure injector resistance using a multimeter. Specification is typically 12-16 ohms for Mini Cooper injectors. Significantly different readings indicate internal faults.
Check the injector wiring harness for damage or corrosion. Mice often chew wiring in engine bays, causing intermittent electrical faults. Inspect connectors for green corrosion or loose pins.
Expected outcome: Good injectors produce fine fuel spray patterns. Faulty injectors may not spray at all or create poor spray patterns. Professional cleaning services can restore some clogged injectors.
Consider professional injector flow testing if problems persist. This service measures precise fuel delivery volumes under operating pressures. Flow testing reveals subtle imbalances causing misfires.
Common mistake: Avoid generic fuel injector cleaners for severe problems. These additives rarely fix mechanically damaged injectors. Professional cleaning or replacement proves more effective.
Related engine access work might reveal other maintenance needs, like Mini Cooper engine mount replacement cost considerations, if mounts show wear.
Diagnose ECU Failure (Cylinder 2 Specific)
Mini Cooper R56 models use MEVD17.2.7 engine control units prone to specific cylinder failures. These ECUs can lose individual cylinder control while maintaining others. Cylinder 2 failures appear frequently in 2008-2010 models.
ECU-related misfires exhibit consistent patterns distinct from ignition problems. The misfire occurs continuously rather than intermittently. Load changes don’t affect misfire frequency significantly.
ECU symptoms: The engine enters limp mode immediately when started. Multiple attempts to clear codes fail permanently. Misfire persists despite replacing all ignition components and fuel system parts.
Professional ECU testing requires specialized equipment beyond typical DIY capabilities. However, some symptoms strongly suggest ECU failure over component problems.
Rebuild vs Replace Options
ECU rebuilding services cost $300-500 compared to $800-1200 for new units. Reputable rebuild services offer warranties and quick turnaround times. Research customer reviews before selecting providers.
Some rebuilders specialize in Mini Cooper MEVD17.2.7 units specifically. They understand common failure modes and stock appropriate components. Generic rebuilders may lack Mini-specific expertise.
Consider Mini Cooper timing chain recall implications if your model is affected. Timing problems can mimic ECU failures in diagnostic symptoms.
Pro Tips and When to See a Mechanic
Prevention beats repair every time. Use quality fuel from reputable stations to prevent injector clogging. Change spark plugs every 30,000 miles regardless of manufacturer recommendations.
Monitor engine performance regularly using OBD2 scanners. Catching misfires early prevents catalytic converter damage from unburned fuel. Replacement catalysts cost thousands of dollars.
Red flag symptoms: Multiple cylinder misfires, metal particles in oil, or severe engine knocking require immediate professional attention. These indicate serious internal damage beyond DIY repair scope.
Consider professional help if electrical testing reveals wiring harness damage. Modern Mini Coopers use complex wiring with multiple splice points. Proper repair requires specific harness knowledge and tools.
Professional services excel at fuel system diagnosis using specialized equipment. Fuel pressure testing, injector flow measurement, and emissions analysis exceed typical DIY capabilities.
Understanding how long do Mini Coopers last helps justify repair investments. Well-maintained R56 models easily exceed 150,000 miles with proper care.
Complement misfire repairs with comprehensive maintenance, including best brake pads for Mini Coopers replacement if due. Systematic maintenance prevents multiple problems simultaneously.
FAQ
u003cstrongu003eWill cylinder 2 misfire damage my engine?u003c/strongu003e
Continuous misfires can damage catalytic converters and wash oil from cylinder walls. Address misfires promptly to prevent expensive secondary damage.
u003cstrongu003eHow much does a P0302 repair typically cost?u003c/strongu003e
DIY coil replacement costs $50-100 per coil. Professional service ranges $200-400 including labor. ECU problems cost significantly more.
u003cstrongu003eCan I drive with cylinder 2 misfire?u003c/strongu003e
Limited driving is possible, but avoid high speeds or heavy loads. Unburned fuel damages catalytic converters and increases emissions significantly.
u003cstrongu003eWhy does cylinder 2 fail more than the others?u003c/strongu003e
No inherent design weakness exists. Cylinder 2 failures appear common due to confirmation bias – people notice patterns in random failures.
u003cstrongu003eShould I replace all coils when one fails?u003c/strongu003e
Age-related replacement makes sense for high-mileage vehicles. However, individual replacement is acceptable for newer vehicles with isolated failures.
Conclusion
Start with coil swapping to identify faulty ignition components quickly. Most P0302 codes resolve with coil or plug replacement. Monitor performance after repairs and maintain regular service intervals.
If basic repairs fail, seek a professional diagnosis for fuel system or ECU problems. Document all repair attempts to help technicians avoid duplicate work.
Keep your Mini running smoothly with proper what type of coolant does Mini Cooper uses alongside ignition system care.