Are Mini Coopers Easy to Work On? Complete DIY Guide for Beginners 2026

The short answer: Mini Coopers are moderately easy to work on for basic maintenance like oil changes and brake pads, but their compact engine bays can make advanced repairs challenging for beginners.
With 70% of Mini owners tackling basic DIY maintenance according to owner forum polls, these quirky cars offer solid learning opportunities—if you know which jobs to start with and which tools you’ll need.
We’ll cover model differences (older R50-R53s are more DIY-friendly than newer F56s), realistic difficulty ratings, and when to call a professional. By the end, you’ll know exactly where Mini Coopers stand on the DIY spectrum and have a clear roadmap for your first repair projects.
The key is understanding that Mini Coopers can last 200,000+ miles with proper maintenance—and doing some of that work yourself can save $200-400 per job compared to dealer prices while building valuable mechanical skills.
Assess Your Skill Level and Model Differences
Before diving into Mini repairs, honestly evaluate your mechanical experience and understand how your specific model affects DIY difficulty. Mini Coopers span multiple generations with vastly different accessibility levels, and matching your skills to the right projects prevents frustration and costly mistakes.
Beginner threshold: You should be comfortable with basic hand tools, following torque specifications, and working under a safely supported vehicle. If you’ve never changed oil or rotated tires, start with observation-only projects first.
Intermediate threshold: Tackle electrical diagnostics, timing-sensitive jobs like spark plugs, and multi-step procedures requiring component removal. You’ll need experience reading wiring diagrams and patience for tight-space maneuvering.
R50-R53 vs. Newer Models
First-generation Minis (2002-2008 R50/R53) offer the most DIY-friendly experience. Their naturally aspirated engines provide better access to common service points, and simpler electronics mean fewer potential failure modes. The supercharged R53 adds some complexity but remains manageable for intermediate mechanics.
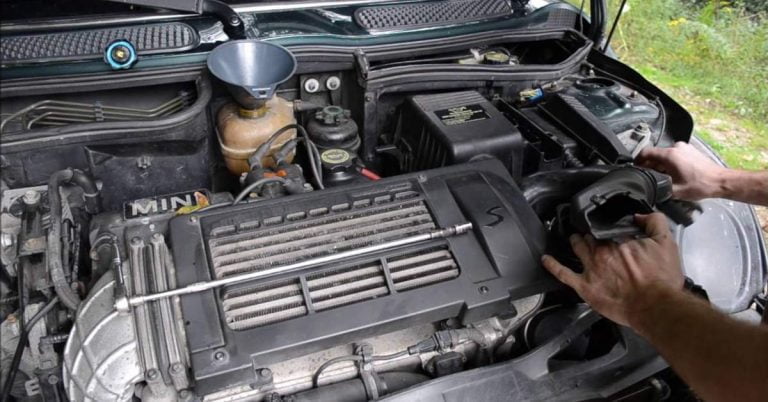
Second-generation R56-R60 models (2007-2016) introduced the problematic Prince engine with tighter packaging and more electronics. Turbochargers, direct injection, and cramped engine bays push many jobs from “weekend project” to “professional territory.” However, basic maintenance remains accessible with the right tools.
Third-generation F-series (2014+) and current models prioritize efficiency over serviceability. Expect more plastic covers, integrated components, and diagnostic requirements. While maintenance costs can be expensive, basic jobs are still DIY-feasible with patience.
Tools for Each Era
Older Minis need standard metric tools and basic electronics knowledge. Newer models require advanced scan tools, specialized BMW/Mini software, and often proprietary adapters for bleeding systems or coding modules.
Essential Tools for Mini Cooper DIY Repairs
Success with Mini DIY repairs heavily depends on having the right tools—and Mini’s BMW heritage means some unique requirements that generic tool sets don’t cover. Building a proper toolkit is an investment that pays dividends across multiple projects.
Basic Kit ($200-300)
Start with these essentials for most routine maintenance:
- OBD2 scanner compatible with Mini systems: Critical for diagnosing issues and clearing codes after repairs
- Torque wrench (10-150 ft-lbs): BMW specifications are precise—overtightening plastic components is expensive
- Swivel socket set: Navigate tight engine bay angles that straight sockets can’t reach
- Oil filter wrench: Mini’s cartridge filters require specific tools depending on the model year
- Jack stands and quality floor jack: Never trust the factory scissor jack for anything beyond tire changes
- Plastic trim removal tools: Prevent cracking of expensive interior and engine bay panels
Advanced Add-Ons ($300-500)
For intermediate projects and diagnostics:
- BMW/Mini-specific scan tool: Generic OBD2 won’t access all modules or perform service resets
- Brake bleeding kit: One-person operation essential for cramped brake line access
- Engine bay work light: Illuminate tight spaces where phone flashlights fail
- Specialty BMW sockets: Star/Torx bits, triple-square bits for suspension and interior fasteners
- Compression tester: Essential for diagnosing engine health on high-mileage Minis
The tool investment typically pays for itself after 3-4 major services when compared to dealer rates averaging $150+ per hour. Quality tools also prevent the stripped bolts and broken clips that turn simple jobs into expensive repairs.
Most tools work across all Mini generations, though newer models may require updated scan tool software or additional adapters for bleeding systems and service light resets.
Oil Change – Easiest Starter Job
Oil changes represent the perfect entry point for Mini DIY maintenance—accessible, low-risk, and offering immediate cost savings. Most Minis require synthetic oil changes every 10,000-15,000 miles (or annually), making this skill essential for any owner planning to keep their car long-term.
Expected outcome: Fresh oil extends engine life significantly, especially on timing chain-prone models. The 30-45 minute job saves $80-120 compared to dealer service while giving you hands-on familiarity with your Mini’s undercarriage.
Step-by-Step Process
- Warm the engine (2-3 minutes of idle): Warm oil drains more completely, but avoid burning yourself on hot components
- Locate drain plug: Usually positioned on the driver’s side oil pan, accessible without removing splash shields on most models
- Position drain pan: Use a wide pan—Mini oil tends to spray initially before settling to a stream
- Remove drain plug with proper socket: 17mm on most models; expect 15-20 ft-lbs reinstall torque
- Replace cartridge filter: Located in upper engine bay housing; requires new O-rings and proper torque (18-20 ft-lbs for housing cap)
- Refill with correct specification: 4.5-5.5 quarts, depending on model; always verify with dipstick rather than trusting capacity numbers
Common mistakes to avoid: Using conventional oil in synthetic-spec engines causes sludging. Overtightening the filter housing cracks expensive plastic components. Always verify what type of coolant does Mini Cooper use while you’re checking fluid levels post-service.
The beauty of Mini oil changes is that you can get your Mini Cooper oil changed anywhere that stocks the right synthetic blend, but doing it yourself ensures quality oil and proper filter replacement—two areas where quick-lube shops often cut corners.
Spark Plug Replacement
Spark plug replacement on Minis offers substantial DIY savings ($300+ compared to dealer service) while being manageable for intermediate mechanics. However, the tight engine bay requires patience and proper technique to avoid dropped components or damaged coil packs.
Expected outcome: Fresh plugs restore smooth idle, improve acceleration response, and maintain fuel economy. Plan 1-2 hours, depending on your model and experience level.
Step-by-Step Process
- Remove engine cover and air intake components: Create working room and access to coil packs
- Disconnect coil packs individually: Mark locations to ensure proper reinstallation; inspect for oil contamination, indicating valve cover gasket issues
- Remove old plugs with a proper spark plug socket: 16mm deep socket with rubber insert prevents dropping plugs into the engine bay
- Gap new plugs to specification: Typically 0.028-0.032″ depending on model year; never assume pre-gapped plugs are correct
- Install hand-tight plus 1/4 turn: Aluminum heads strip easily; torque specs vary by plug type (18-22 ft-lbs typically)
- Reinstall coil packs with dielectric grease: Prevents moisture intrusion and ensures proper electrical connection
Common mistakes: Dropping old plugs or tools into the tight engine bay requires significant disassembly to retrieve. Cross-threading plugs into aluminum heads necessitates expensive thread repair. Always work on one cylinder at a time to prevent mixing up coil pack positions.
Consider upgrading your air filter during this service since intake components are already removed. The combination service maximizes efficiency and ensures your engine breathes properly with fresh plugs.
Mini’s high-strung engines are particularly sensitive to plug condition—worn plugs cause misfires that can damage expensive catalytic converters, making this DIY maintenance both cost-effective and protective.
Brake Pad Swap
Brake pad replacement on Mini Coopers falls squarely in the intermediate DIY category—not difficult mechanically, but requiring attention to safety and proper bleeding procedures. The compact brake components and tight wheel well access demand patience over speed.
Expected outcome: Fresh pads restore confident stopping power and eliminate squealing. Budget 1-2 hours per axle for your first attempt, with significant cost savings over the $400-600 dealer charges for front and rear service.
Step-by-Step Process
- Secure vehicle properly: Use jack stands at designated lift points; never work under a car supported only by a jack
- Remove wheels and inspect rotors: Check for scoring, warping, or minimum thickness specifications before proceeding
- Compress caliper pistons slowly: Use a C-clamp or a specialized tool; rapid compression can damage ABS components
- Remove caliper bolts and swing caliper aside: Support calipers to prevent brake line strain; 18mm bolts typically
- Replace pads and hardware: Always replace pad clips and anti-squeal shims; lubricate contact points with brake grease
- Reassemble and bed-in pads: Follow proper bed-in procedure (gentle stops from 35mph, avoiding complete stops initially)
Common mistakes: Failing to properly support the vehicle causes serious injury risk. Skipping the brake fluid flush when pistons are compressed introduces air into the system. Not following bed-in procedures reduces pad life and performance.
Use only quality brake pads designed for Mini Coopers to ensure proper fit and performance—generic pads often cause noise and premature wear on Mini’s specific brake system design.
The key to successful Mini brake work is patience and a methodical approach. The tight quarters make it tempting to rush, but brake system integrity isn’t worth the time savings.
Challenging Jobs – When to Call a Pro
Not all Mini Cooper repairs suit DIY approaches, especially on newer models, where complexity and specialized tools make professional service more practical and cost-effective. Recognizing these boundaries prevents frustration, expensive mistakes, and potential safety issues.
Timing chain replacement tops the list of professional-only jobs. Mini’s timing chain issues (particularly on N14/N18 engines) require engine removal or significant disassembly, specialized timing tools, and precise procedures. The $3,000-5,000 repair cost reflects genuine complexity, not inflated labor charges.
Turbocharger work on R56+ models demands specialized diagnostic equipment and calibration procedures. While mechanically straightforward, the integration with engine management systems requires BMW/Mini software access beyond typical DIY capabilities.
Transmission problems in Minis often involve complex diagnostics and specialized tools. Whether automatic or manual, modern Mini transmissions require precise procedures and expensive fluids that make professional service worthwhile.
Engine mount replacement illustrates the space constraints that make some “simple” jobs impractical for home mechanics. While the concept is straightforward, accessing and supporting the engine in Mini’s cramped bay requires professional-grade equipment.
Signs to stop and seek help: If you’re removing more components than expected to access the target part, if specialized software is required for completion, or if you’re working with safety-critical systems beyond your experience level, professional service becomes the smart choice.
The line between DIY and professional work often comes down to tool investment versus repair frequency—spending $500 on specialized tools for a one-time repair rarely makes financial sense.
Pro Tips for Easier Mini Repairs
Successful Mini DIY work relies heavily on preparation, proper technique, and learning from the extensive Mini community knowledge base. These strategies separate smooth repairs from frustrated weekend disasters.
Engine bay organization is crucial: Mini’s tight spaces leave no room for misplaced tools or dropped hardware. Use magnetic trays, organize bolts by removal sequence, and always have a powerful flashlight positioned before starting work.
Leverage online communities: North American Motoring, MiniTorque, and model-specific Facebook groups provide real-world solutions to common problems. YouTube channels like “Humble Mechanic” and “Mini Cooper DIY” offer visual guides for complex procedures.
Follow the maintenance schedule religiously: Mini engines are less forgiving than mainstream brands when maintenance is deferred. Staying ahead of scheduled services prevents minor issues from becoming major failures.
Invest in quality fluids and parts: Mini’s BMW heritage means premium components throughout—cheap oil, filters, or fluids cause expensive problems down the road. Stick to BMW/Mini specifications even for DIY work.
Master the art of patience: Mini repairs rarely go as quickly as anticipated. Plan extra time, work methodically, and don’t force components that resist removal.
Consider keeping emergency backup plans ready. Knowing how to jump start a Mini Cooper or having roadside assistance ensures that project complications don’t strand you.
The Mini community’s collective knowledge exceeds any individual mechanic’s experience—tap into that resource for model-specific tips and troubleshooting guidance.
FAQ
Are R56 Mini Coopers harder to work on than F56 models?
R56s (2007-2016) are generally easier for DIY work despite their timing chain issues. F56s (2014+) have better reliability but more integrated electronics and tighter packaging that complicates access to common service items.
How much money can I realistically save doing my own Mini maintenance?
Basic maintenance (oil, filters, spark plugs, brakes) typically saves $200-400 per service compared to dealer rates. Annual savings of $800-1200 are common for owners who tackle routine maintenance themselves.
What’s the best first repair project for Mini beginners?
Oil changes offer the perfect introduction—low risk, immediate cost savings, and essential familiarity with your car’s layout. Success builds confidence for more complex projects like air filters and cabin filter replacement.
Do I need BMW-specific tools for Mini repairs?
For basic maintenance, quality metric tools suffice. Advanced diagnostics and service resets require BMW/Mini compatible scan tools, but many repairs use standard equipment with occasional specialty sockets.
Which Mini generation offers the best DIY experience?
First-generation R50/R53 models (2002-2008) provide the most accessible DIY platform with simpler electronics, better engine bay access, and extensive community documentation for common repairs.
Conclusion
Mini Coopers offer a solid middle ground for DIY mechanics—easier than German luxury cars but more challenging than mainstream economy vehicles. Success depends on matching your skill level to appropriate projects, investing in proper tools, and respecting the boundaries between DIY and professional work.
Start with basic maintenance, build your confidence and tool collection gradually, and tap into the extensive Mini community resources for guidance and troubleshooting support.