How to Fix a Broken Mini Cooper Hood Latch Cable: Repair Guide & Cost Breakdown

A broken hood latch cable leaves you stranded without engine access—whether you need to jump-start the car, check the oil, or perform maintenance. For Mini Cooper owners, this isn’t a rare occurrence. The hood release cables on Mini Coopers have a well-documented tendency to seize and fail due to corrosion and lack of lubrication, particularly on R56, R55, and Clubman models. This guide covers everything from emergency access to permanent repair solutions.
Understanding Your Mini’s Hood Latch System
The Mini Cooper hood operates on a dual-latch mechanism controlled by a single release lever inside the cabin. Two cables run from the interior release handle through the firewall to the engine bay, where they connect to latches on both sides of the radiator support.
When you pull the handle, the cables trip both latches simultaneously, allowing the hood to pop open. A secondary mechanical catch on the underside of the hood provides additional safety during driving.
The system’s design creates a vulnerability: both cables share a common housing and routing path, and they’re exposed to engine bay moisture and temperature swings. Over time, the metal cable corrodes inside its sheath, causing it to seize. If you force it anyway, the cable snaps—leaving you with a hood that won’t open at all.
Quick Diagnosis: Cable Seizing vs. Complete Breakage
Before assuming your cable is broken, rule out partial failure. A seized cable and a snapped cable require different solutions.
Signs of a seizing cable: The release handle pulls harder than normal but still moves. You might hear grinding sounds. The hood locks on only one latch instead of both. Applying pressure to the hood from outside while pulling the handle sometimes helps it release.
Signs of a completely broken cable: The handle pulls freely with no resistance. Nothing happens when you pull it. You’ll see a gap or slack in the cable visible from under the hood.
If your cable is merely seized, lubrication with white lithium grease can restore function before it breaks. Spray grease into the cable housing around the latch assembly and work the handle back and forth several times. This simple step has resolved the issue for many Mini owners before requiring replacement.
Emergency Method: Opening a Hood with a Broken Cable
When the cable is completely snapped and the hood is sealed shut, you need immediate access. This temporary solution gets you engine access without professional help.
Tools needed: Vice grip pliers or locking pliers, hammer, long screwdriver (12+ inches), flashlight, and a helper.
Step 1: Locate the cable end. Pop the dashboard trim panel under the steering wheel. You’ll see the release handle assembly and the broken cable’s interior end. If it’s snapped, you’ll see a gap or just the sheath.
Step 2: Access the latch from under the car. Raise the front end on ramps or a jack (secure it properly). Crawl under the vehicle with a flashlight. You’ll see the two hood latches behind the grille/radiator support. Look for where the cables attach—two small metal arms or hooks on each side.
Step 3: Release the mechanical latches. Each latch has a mechanical arm that the cable normally pulls. You can manually push or pull this arm to trip the latch without the cable. Use a long screwdriver to reach behind the latches and pry the mechanical release arm. Apply steady pressure—don’t jab at it. The latch will release with a distinct click.
Step 4: Pop the hood. Once both latches are released, have your helper push upward on the hood while you guide it open. Some force may be required if corrosion has made the hinges sticky.
If you cannot access the latch from underneath due to close tolerances or layout differences, the alternative is removing the front grille (held by several plastic clips) to reach the latches from above. This is less elegant but works when undercar access is impossible.
Temporary Fix: Reseating the Cable Housing
If the cable itself isn’t broken but has simply pulled out of its seat, this quick fix restores function immediately without replacement.
This happens when the cable housing at the interior handle connection has become loose or misaligned. The cable assembly has a plastic collar that seats into a bracket on the release lever. Over time, vibration can dislodge it.
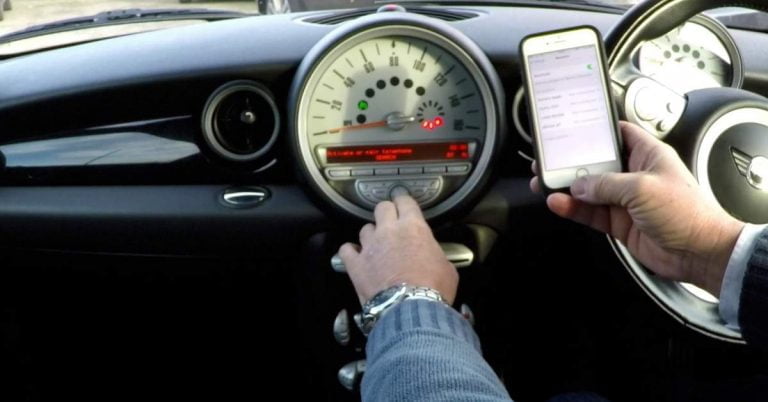
Step 1: Remove the lower dashboard trim panel under the steering wheel. You’ll see the bonnet release lever assembly.
Step 2: Locate where the black cable housing connects to the lever. You should see a plastic collar or clip holding it in place.
Step 3: Ensure the cable housing is fully seated in its bracket. Push it in firmly until you hear a click or feel resistance.
Step 4: Test the handle. Pull gently—it should feel normal and the hood should pop open.
If reseating works, the underlying cable may still be stiff or corroded. Apply white lithium grease through the cable housing’s lubricant port (usually a small opening on the latch assembly) and work the handle repeatedly to distribute the grease throughout.
Professional-Grade Repair: Replacing the Hood Release Cable
A true cable replacement involves routing a new cable through the vehicle’s firewall and engine bay—a job that separates DIY mechanics from professionals. The difficulty lies in running the cable through tight spaces without kinking or damaging it.
Cost expectations: Parts run $60–$80 for OEM Mini cables. Labor ranges from $140–$200 for a shop, assuming no complications. Total repair bill: $200–$280. For comparison, a latch replacement alone costs $170–$220 with labor.
Tools and materials required:
- New OEM hood release cable assembly (parts number varies by model year; check the specific generation: R56, R55, R57, F56, etc.)
- 10mm socket and wrench
- Pliers and wire cutters
- Copper wire (as a pull-through aid)
- Flashlight and inspection mirror
- Trim removal tools (plastic pry bars)
The procedure:
Step 1: Access the cable at the interior handle. Pop the dashboard trim below the steering wheel. Remove the fasteners (usually 10mm bolts) holding the interior release handle assembly.
Step 2: Disconnect the old cable. Note how the cable is routed and connected before removing anything. Take photos. Unbolt the cable at the handle end and remove the fasteners securing the cable housing to the firewall bulkhead. You’ll likely need to remove some trim or weather sealing to access these bolts.
Step 3: Pull the cable out. From the interior, pull the old cable assembly out of its routing path. It should slide through the firewall hole. If it’s stuck due to corrosion or kinks, gently work it side-to-side while pulling. Do not force it—you risk damaging the firewall opening.
Step 4: Prepare the new cable for routing. The cable is long and must be threaded through the engine bay. Many mechanics attach a piece of copper wire or fishing line to the new cable’s end before feeding it through. This creates a handle for pulling it the full distance without kinking.
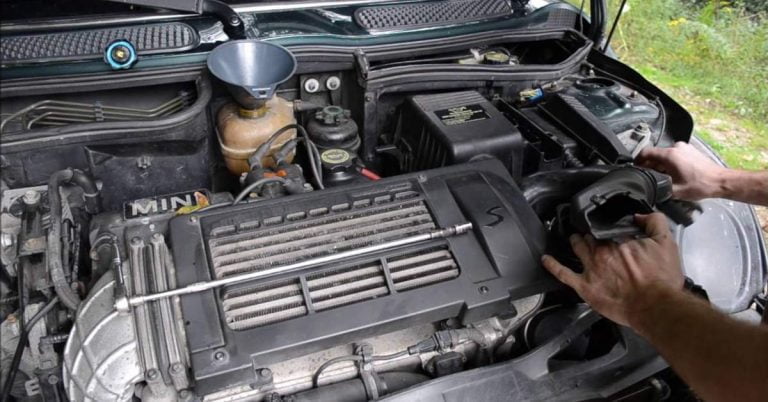
Step 5: Route the new cable. Feed the cable from the engine bay through the firewall opening. Guide it along the same path as the original, ensuring it doesn’t touch hot surfaces or sharp edges. The cable runs alongside frame members and around the coolant expansion tank. Some engines require partial disassembly for clear routing.
Step 6: Connect at the latch end. Both hood latches require connection points. The new cable splits into two branches, one per latch. Align each branch with its respective latch mount and secure with the provided clip or bolt. Ensure both branches are taut but not over-tightened—excessive tension prevents the latch from closing fully.
Step 7: Reassemble and test. Reconnect the cable at the interior handle. Reinstall all trim pieces and fasteners. Close all doors. Test the release handle. It should require moderate pull effort—similar to the original before it failed. The hood should pop up, and both latches should release evenly.
Step 8: Adjust hood alignment (if needed). After replacing the cable, the hood position might shift slightly. Open the hood and check its alignment with the fenders and headlights. If misaligned, you can adjust the latch position slightly by loosening its mounting bolts and sliding it left/right or forward/backward. Once aligned, tighten the bolts and retest.
Prevention: How to Avoid Cable Failure
Your new cable will last longer if you perform preventive maintenance.
Apply white lithium grease annually. Locate the cable housing where it attaches to the latch assembly (visible when the hood is open). Spray a small amount of white lithium grease directly onto the cable housing connection point and the latch mechanism. Work the release handle 10–15 times to distribute the grease through the cable’s interior. This prevents corrosion and seizing.
Don’t force the handle. Pulling hard on a stiff handle accelerates cable wear. If it becomes stiff, lubricate immediately rather than forcing it.
Inspect periodically. Every 12–24 months, check the cable housing where it exits the firewall. Look for cracks, corrosion, or signs of water intrusion. Early intervention prevents failure.
Consider upgrading to stainless or coated cables if available. Some aftermarket suppliers offer corrosion-resistant alternatives to OEM cables, though availability is limited for Mini Coopers.
Cost Comparison: DIY vs. Professional Repair
| Repair Type | DIY Cost | Labor Cost | Total Professional Cost | Difficulty |
|---|---|---|---|---|
| Lubrication (preventive) | $5–$10 | N/A | N/A | Beginner |
| Emergency access (temporary) | $0–$20 | N/A | N/A | Beginner |
| Cable replacement | $70–$90 | $140–$200 | $210–$290 | Advanced |
| Latch replacement | $60–$80 | $100–$150 | $160–$230 | Intermediate |
| Cable + latch replacement | $130–$170 | $200–$300 | $330–$470 | Advanced |
The cable replacement is the most labor-intensive, which is why professional shops charge substantially for it. If you’re comfortable removing trim panels and routing small parts through tight spaces, DIY saves $140–$200. However, improper routing can damage the new cable, requiring another replacement.
Choosing Between Cable Replacement and Latch Repair
Your decision depends on what’s actually failed.
Replace the cable if: The handle pulls, but nothing happens. The cable feels slack or has broken visibly. Lubrication didn’t help. The handle position seems correct, but it is unresponsive.
Replace the latch if: The cable feels tight and responsive, but the hood still won’t open. You can manually open the latch from underneath without issue. The latch appears visibly corroded or cracked. The latch has internal damage from forced pulling.
In practice, Mini owners often replace both together. The cable and latch are connected components, and if one has failed through age and corrosion, the other likely isn’t far behind. A combined replacement costs only $30–$50 more in parts than cable alone but provides lasting reliability.
When to Call a Professional
DIY cable replacement makes sense if you have mechanical aptitude and time. Call a shop if:
- The hood won’t open even with emergency access techniques. This suggests additional damage requiring professional diagnosis.
- You’ve already attempted the cable routing and suspect you’ve kinked or damaged the new cable.
- You’re uncomfortable working under the car or removing trim panels.
- Your Mini has a complex engine bay layout (turbocharged models have tighter spacing).
- You want warranty coverage on the repair (most independent shops offer 1–2 year warranties on labor).
Professional repair typically takes 1.5–3 hours, depending on complications. Some shops can complete it the same day if parts are in stock.
Final Takeaway
A broken Mini Cooper hood latch cable is frustrating but manageable. If the cable is merely seized, lubrication can restore it for under $10. If it’s completely broken, emergency access techniques get you engine access within 30 minutes.
Permanent repair through cable replacement runs $200–$290 professionally or $70–$90 if you DIY, but requires mechanical skills. Regular maintenance with white lithium grease every 12 months prevents failure entirely, making prevention the cheapest long-term solution.