
Tesla Model X 12V Battery Replacement: Everything You Need to Know

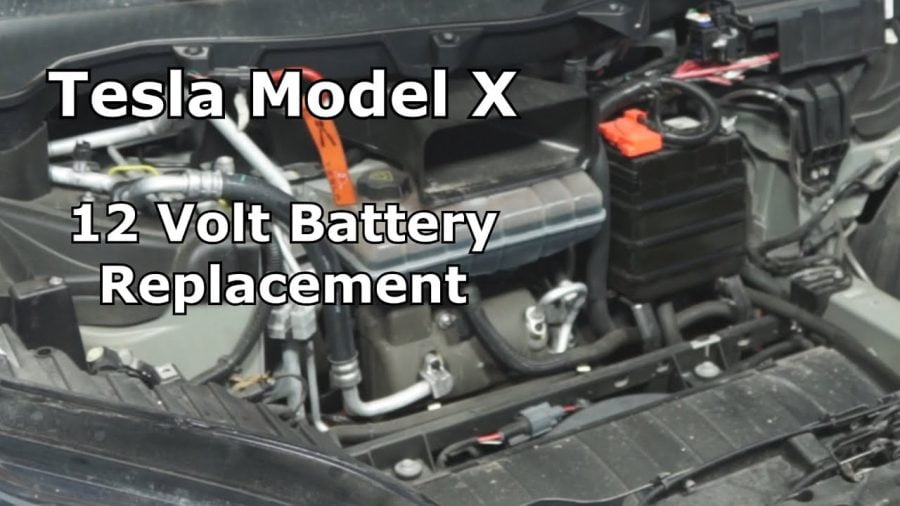
The Tesla Model X may run on a massive high-voltage battery pack, but it relies on a humble 12-volt auxiliary battery to power critical low-voltage systems. When this 12V battery fails, you face locked doors, unresponsive screens, and a car that won’t start. Understanding when and how to replace this component saves frustration and keeps your Model X running smoothly.
What the 12V Battery Does in Your Tesla Model X
Your Model X uses the 12V battery to operate systems that can’t run on high voltage. This includes door locks, touchscreen displays, power windows, wipers, and the computer that controls everything. The high-voltage traction battery charges this 12V unit while driving, but when parked, the 12V battery maintains these functions independently.
Unlike traditional vehicles, where the 12V battery starts the engine, your Model X uses it to wake up computers and engage the high-voltage contactors. Without a functioning 12V battery, the entire vehicle shuts down regardless of how much charge remains in the main battery pack.
Signs Your 12V Battery Needs Replacement
Tesla vehicles display warnings before complete failure. Watch for a “12V Battery Needs Service” message on your touchscreen. This alert typically appears weeks before the battery dies, giving you time to schedule replacement. Ignore it at your peril—the battery can fail suddenly after this warning.
Other symptoms include random error messages that clear after rebooting, mirrors folding and unfolding spontaneously, hazard lights activating without input, and slow touchscreen response. If you notice the car cycling power when you open the door, with systems repeatedly turning on and off, your 12V battery is likely failing.
In cold weather below 40°F, a weak 12V battery shows symptoms faster. You might find yourself locked out completely, unable to access the interior. The manual front trunk release becomes your only entry point in this scenario.
How long does the 12V Battery Lasts
Most Tesla Model X 12V batteries last between three and five years. Lead-acid batteries typically reach end-of-life around four years, while lithium iron phosphate upgrades extend this to eight years or more. Your driving patterns affect longevity—frequent short trips prevent full charging cycles and accelerate degradation.
Sentry mode and third-party accessories create parasitic drains that shorten battery life. Hot climates above 100°F accelerate chemical reactions inside the battery, reducing capacity faster. Cold temperatures don’t damage the battery permanently, but can trigger temporary failures in already-weak units.
The original equipment manufacturer battery in 2016-2021 Model X vehicles is an Atlas BX B19 lead-acid unit weighing 29 pounds. Tesla transitioned to lithium-ion 12V batteries in late 2023 models, which offer superior lifespan and efficiency.
Tesla Model X 12V Battery Location and Access
The 12V battery sits in the front trunk under multiple protective layers. Open the frunk and locate the plastic trim panel on the driver’s side. Remove this panel to expose the fireman’s loop disconnect, a bright orange handle used for emergency power shutoff.
Behind the frunk liner sits a hard plastic tub covering the HEPA filter and battery compartment. You’ll need to disconnect the LED lights and gasket seals before removing this tub. The HEPA filter must come out next, revealing the battery tray secured with 13mm bolts.
The battery cage itself holds the 12V unit in place with additional 10mm fasteners. Four bolts secure the tray to the chassis—two at the bottom, two at the top. The entire assembly slides forward and lifts out once all fasteners are removed.
Step-by-Step 12V Battery Replacement Process
Gather your tools before starting: 10mm socket and wrench, 13mm socket and wrench, cordless impact driver or ratchet, and protective gloves. Budget 30-45 minutes for the complete job if you work methodically.
Start by opening the frunk and removing the driver-side plastic trim panel. Disconnect the fireman’s loop by pulling the orange handle. Remove the frunk liner by detaching the LED light connectors and releasing the gasket seals. Carefully lift out the hard plastic tub covering the HEPA filter.
Pull out the HEPA filter to access the battery compartment. Locate the four 13mm bolts securing the battery tray and remove them using your socket wrench. Disconnect the battery terminals before removing the tray—always start with the negative terminal marked with a minus sign.
Loosen the 10mm bolt on the negative terminal and pull the connector straight off. Tuck it aside to prevent accidental contact. Repeat this process for the positive terminal marked with a plus sign. Remove the 10mm nut securing the battery hold-down bracket and slide the old battery out.
Install the new battery by reversing these steps. Ensure positive terminals face left for proper cable reach. Connect the positive terminal first, then the negative. Torque the battery tray bolts to manufacturer specifications—hand-tight plus a quarter turn works for DIY installations.
OEM vs Aftermarket Battery Options
Tesla service centers install Atlas BX B19 lead-acid batteries as direct replacements. These units cost around $250-300 for the part alone. Service center installation adds $150-200 in labor, bringing total costs to $450-500. Mobile service visits typically charge $260-300 for a complete replacement.
Lithium iron phosphate batteries from aftermarket suppliers like Ohmmu offer significant advantages. These units weigh just 11 pounds versus 29 pounds for lead-acid, reducing unsprung weight. They provide four times the lifecycle of OEM batteries and maintain voltage better under load.
Aftermarket lithium batteries cost $400-500 but include Bluetooth monitoring via smartphone apps. You can track voltage, temperature, and charge cycles in real-time. The extended lifespan offsets the higher initial cost—replacing your battery once in eight years versus twice in four years saves money long-term.
Ensure any replacement battery matches the B19 group size and fits the 2016-2021 Model X specifications. Tesla revised the low-voltage system to 15.5V in 2022 models, making earlier lithium batteries incompatible with newer vehicles.
Professional Installation vs DIY Replacement
Tesla mobile service handles 12V battery replacement at your location for $260-300. This includes parts, labor, and proper disposal of the old battery. Service center appointments cost $450-500 but may have longer wait times. Mobile technicians usually schedule within one week of your service request.
DIY replacement saves $150-200 in labor costs but requires comfort working with vehicle systems. The process involves no high-voltage components, making it safer than working on the main battery pack. You’ll need basic hand tools and 30-45 minutes of uninterrupted time.
After replacement, the car should recognize the new battery automatically. Some owners report needing to recalibrate power windows and door sensors. Perform a full power cycle by disconnecting the new 12V battery for 30 seconds, then reconnecting it to clear any error codes.
Third-party auto shops familiar with electric vehicles can perform this service for $200-300. Many traditional mechanics avoid working on Teslas, so confirm their experience before scheduling. Independent EV specialists often charge less than Tesla service centers while using quality replacement parts.
Cost Breakdown for 12V Battery Replacement
Out-of-warranty replacement through Tesla service centers runs $450-500 total. This includes a $250-300 OEM battery and a $150-200 labor charge. Mobile service typically costs $260-300, offering better value with convenient at-home installation.
DIY replacement using an OEM Atlas BX battery costs $250-300 for parts only. Purchasing from third-party suppliers like Evolution Parts often reduces this to $200-250. Factor in disposal fees for the old battery—most auto parts stores accept lead-acid batteries for free recycling.
Aftermarket lithium iron phosphate batteries cost $400-500 but eliminate the need for a second replacement during ownership. When you factor in the labor for two OEM battery changes versus one lithium upgrade, the total cost equalizes around $900 either way.
Extended warranty coverage through Tesla rarely includes 12V battery replacement, as it’s considered a consumable wear item. Basic warranty covers the battery for four years or 50,000 miles, whichever comes first. Check your specific warranty documents to confirm coverage details.
Preventing Premature 12V Battery Failure
Minimize sentry mode usage when possible, as continuous monitoring drains the 12V battery faster. The high-voltage contactors stay open during sentry mode, forcing the 12V battery to maintain computers and cameras alone. Limit this feature to high-risk parking situations rather than constant use.
Drive your Model X regularly to keep the 12V battery charged. Short trips of less than 15 minutes don’t allow full charging cycles, gradually weakening the battery. Combine errands into longer drives when possible, giving the system time to properly charge the 12V unit from the main battery pack.
Avoid installing aftermarket accessories that draw power when the vehicle is off. Dashcams, GPS trackers, and similar devices create parasitic drains that accelerate battery degradation. If you must use these accessories, ensure they power down completely when the car sleeps.
Park in moderate temperatures whenever possible. Extreme heat above 100°F damages battery internals, while severe cold below 0°F temporarily reduces capacity. Garage parking protects the 12V battery from temperature extremes that shorten its lifespan.
When storing your Model X for extended periods, check battery voltage monthly. The car should maintain the 12V battery automatically, but failures can occur during long storage. If the voltage drops below 12.4V while the car is plugged in, schedule service immediately to prevent complete failure.
Troubleshooting 12V Battery Issues
If your Model X displays error codes like BMS_f151, BMS_w151, or GTW_w017, the 12V battery is likely failing. These Battery Management System warnings indicate voltage irregularities that prevent normal operation. Schedule replacement immediately when these codes appear.
A completely dead 12V battery prevents door access and touchscreen operation. Use the manual front trunk release located under the front tow hook cover. Connect a jump starter to the 12V terminals in the frunk to temporarily restore power. This allows you to drive to service or complete a DIY replacement.
If your new 12V battery shows immediate warnings or error messages, perform a complete system reset. Disconnect the battery negative terminal, wait 30 seconds, then reconnect. This clears residual error codes stored in vehicle memory.
Some owners report a voltage reading of 12.6V despite failure symptoms. The Battery Management System may trip into safe mode to protect vehicle computers even when the voltage appears normal. Replace the battery regardless of voltage readings when warnings appear.
Bulging battery cases or rotten egg smells indicate immediate replacement needs. Lead-acid batteries release hydrogen gas when failing, creating safety hazards. Do not attempt to jump-start or charge a battery showing physical damage—replace it immediately.
Why the 12V Battery Matters for Vehicle Function
The 12V battery bridges the gap between the high-voltage traction battery and low-voltage accessory systems. Your Model X can’t engage the high-voltage contactors without 12V power to control relays. This creates a dependency where even a fully charged main battery becomes inaccessible if the 12V unit fails.
Modern Teslas include more sophisticated Battery Management Systems that protect the main battery pack when the 12V voltage drops. The car enters a high-power mode, keeping high-voltage contactors engaged to continuously charge the 12V battery. This prevents you from getting stranded, but increases phantom drain significantly.
Critical safety systems depend on the 12V battery, including electronic brakes and power steering. While the main battery powers these during driving, the 12V battery maintains their control modules. A complete 12V failure while driving is rare, but it would disable these systems until you stop and restart the vehicle.
The investment in a quality 12V battery pays dividends in reliability. Spending $400-500 once for a lithium upgrade versus $250 every three years for lead-acid batteries makes financial sense. Factor in the convenience of not dealing with unexpected failures, and proper maintenance becomes an obvious priority.
Tesla continues refining the 12V system with each model revision. Newer vehicles integrate the 12V battery more closely with the main battery pack, improving charging efficiency and extending lifespan. If you own a 2016-2021 Model X, expect to replace the 12V battery at least once during ownership—plan accordingly to avoid inconvenient surprises.