Jeep Compass Screen Not Turning On: Complete Troubleshooting and Repair Guide 2026

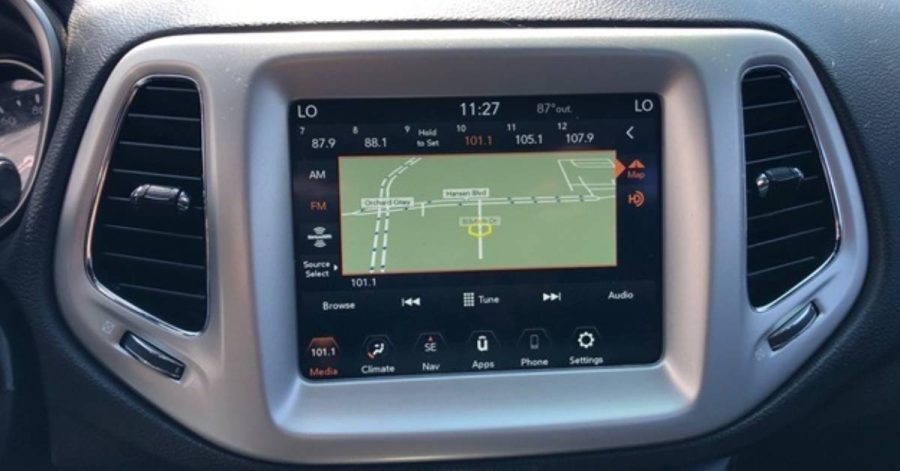
Your Jeep Compass screen went black, cutting off access to navigation, climate controls, and backup camera. This issue affects thousands of Compass owners, particularly 2017-2022 models with Uconnect systems. Most cases stem from fixable software glitches or known hardware defects you can address yourself before spending hundreds at the dealership.
Screen failures typically fall into three categories: temporary software freezes (solvable in minutes), power delivery issues (requiring basic electrical checks), and hardware degradation (the widespread delamination problem). Understanding your specific issue determines whether you need a 30-second reset or a $150 replacement part.
See more: How to reset the Jeep Compass?
Perform an Immediate Soft Reset
This solution requires no tools and takes under 60 seconds. Soft resets clear temporary system glitches, causing 60-70% of black screen complaints.
Start your Jeep and reach accessory mode or full ignition. Locate the Volume knob and Tune/Enter knob on your center console. Press both buttons simultaneously and hold for 15-20 seconds without releasing. Your screen appears completely dead during this process—that’s normal.
Watch for the Jeep splash logo to flash briefly on the display. Once you see this boot screen, release both buttons and wait 30-60 seconds for the system to restart. The Uconnect interface should reload with all functions restored.
If the screen stays black after the first attempt, repeat the procedure two to three times. Some owners report success only after holding the buttons for a full minute on the third try. The system occasionally requires multiple reset cycles to clear corrupted temporary files.
This method preserves all saved settings, radio presets, and paired devices. You won’t lose navigation favorites or climate control preferences.
Check Power Supply and Fuses
When soft resets fail, the issue often traces to interrupted power delivery. The Uconnect system draws power through dedicated fuses that blow due to electrical surges or age-related wear.
Locate your primary fuse box under the hood on the driver’s side. Pop the cover by pressing the two black clips simultaneously and lifting straight up. The inside cover displays a fuse diagram showing numbered positions.
For 2017-2022 Compass models, inspect three critical fuses:
- Fuse F02 (25 amp, clear) powers the Body Control Module, managing the infotainment system—your primary suspect
- Fuse #19 (20 amp, yellow) controls the radio amplifier
- Fuse #20 (15 amp, blue) supplies direct radio power
Remove each fuse and examine the thin metal strip visible through the clear plastic housing. A blown fuse shows a broken or melted strip. Clean the metal tabs with a dry cloth before reinserting, even if fuses appear intact—corrosion on contacts can interrupt power flow.
If you find a blown fuse, replace it with an identical amperage rating. Never substitute a higher-amp fuse—this bypasses safety protections and risks electrical fire. Auto parts stores sell individual fuses for under $2.
After replacing any fuse, leave it out for 2-3 minutes before reinstalling. This waiting period allows the system to fully discharge stored electrical charges, creating a more thorough reset.
Address Auxiliary Battery Failure
Many Compass owners overlook the auxiliary battery—a small 12V AGM unit separate from your main starter battery. This secondary battery supports the start-stop system and stabilizes voltage to electronic components, including your infotainment screen.
Symptoms of auxiliary battery failure:
- “Start-Stop Unavailable Service System” warning on your dashboard
- Intermittent screen flickering
- The entire gauge cluster momentarily goes dark before recovering
- Issues appearing only during cold weather or after short trips
The auxiliary battery sits in the engine compartment, typically beneath a plastic tie-down near the air filter housing. Accessing it requires disconnecting both main battery terminals first (negative/black, then positive/red) to prevent electrical shorts.
Replacement auxiliary batteries cost $120-$200, depending on brand. AutoZone’s Duralast AUX14 and Odyssey 68152MHPD models fit most Compass applications. Verify you need AGM (Absorbed Glass Mat) chemistry—standard flooded batteries fail rapidly under start-stop system demands.
After installing a new auxiliary battery, reconnect your main battery terminals (positive first, then negative) and start the vehicle. The “Service System” warning should clear within one drive cycle.
Disconnect the Main Battery
A complete power cycle resolves stubborn electronic issues that soft resets miss. This procedure forces every vehicle computer module to reboot from scratch.
Turn off your Jeep completely and remove the key or fob. Open the hood and locate the main 12V battery in the engine compartment. Using a 10mm wrench or socket, loosen the negative (black) terminal first—this is critical for safety. Lift the cable completely away from the battery post.
Next, disconnect the positive (red) terminal. Let both cables hang free for 10-15 minutes. This extended wait time drains residual power from capacitors throughout the electrical system.
After 15 minutes, reconnect the positive terminal first, tightening the nut securely. Then reconnect the negative terminal. Start your Jeep. The Uconnect system will take longer than usual to boot (60-90 seconds), as it runs through initialization procedures.
This reset erases radio presets, clock settings, and temporary Bluetooth pairings. Your permanently saved devices and navigation favorites should remain intact.
Inspect for the Delamination Defect
A design flaw affects virtually every Uconnect 4 system produced for 2017-2022 Jeep Compass vehicles. The LCD screen uses an adhesive between the glass digitizer and display panel that breaks down after 2-4 years, creating visible bubbles or air pockets beneath the screen surface.
Early delamination appears as small bubbles in screen corners. As the adhesive continues deteriorating, bubbles spread across the display, accompanied by ghost touches (the screen registers inputs you didn’t make), unresponsive areas, or complete black-out with the backlight still faintly visible.
Examine your screen closely with the vehicle off. Tilt your viewing angle and look for raised areas, cloudy spots, or visible separation between layers. The defect affects both 7-inch and 8.4-inch Uconnect displays.
This problem stems from heat cycling—repeated exposure to hot summer temperatures followed by cooler nights causes the adhesive to expand and contract until it loses bonding strength. Stellantis issued internal dealer guidance (NHTSA Communication S2108000130) acknowledging the failure pattern, though this stopped short of an official recall.
Touch functionality often fails before visual delamination becomes obvious. If your screen responds to some touches but ignores others, or occasionally “calls” contacts without your input, delamination has likely started, even if you can’t see bubbles yet.
Verify USB Device Interference
An overloaded or incompatible USB drive sometimes crashes the Uconnect system, causing a black screen that persists until you remove the device.
If you keep a USB flash drive plugged into your center console for music, remove it immediately and restart the vehicle. Uconnect systems struggle when USB drives exceed 70-80% capacity, especially with drives over 32GB filled with thousands of audio files.
The system attempts to index every file on the drive at startup. If this process overwhelms the processor, Uconnect freezes mid-boot, leaving you with a black screen.
Remove all USB devices, including phone charging cables plugged into USB-A ports. Restart the Jeep and perform a soft reset (Volume + Tune knobs for 15-20 seconds). Wait for the system to fully load before reconnecting any USB device.
If reintroducing the USB drive causes the screen to black out again, the drive is the culprit. Reduce the number of files stored on it—keep at least 40-50% storage capacity free—and use a smaller capacity drive (16GB or less) for better compatibility.
Replace the LCD Screen Yourself
Screen replacement represents the permanent fix for delamination and most hardware failures. Aftermarket replacement screens cost $80-$200 depending on size (7-inch vs 8.4-inch) and seller, compared to $450-$1,400 for dealer installation.
This repair requires basic hand tools and moderate mechanical skill:
- Plastic pry tools (to avoid scratching trim)
- T20 Torx bit
- Phillips screwdriver
Most replacement screens sold on Amazon or eBay include necessary ribbon cables and take 45-90 minutes to install for a first-timer.
Installation Steps
Start by removing the center console trim panel surrounding the screen. Insert pry tools at each corner and work around the perimeter, releasing 8-10 plastic clips.
Behind the trim, four T20 Torx screws secure the radio unit to the dashboard brackets. Remove these screws and carefully pull the radio forward. Press the locking tabs and disconnect each color-coded wiring harness on the rear panel.
The screen attaches to the radio housing with six Phillips screws visible once you remove a metal shield bracket. Lifting the screen reveals two ribbon cables connecting it to the main board. These connectors have small black levers—flip them up, then gently slide the ribbon cables out.
Installation reverses these steps: insert the new screen’s ribbon cables, lock them down by pressing the black levers, secure the six Phillips screws, and reconnect the wiring harnesses. Before reinstalling everything in the dash, reconnect your battery and test the new screen to verify proper function.
Replacement screens with “gel-free” touchscreen technology solve the delamination problem permanently. These upgraded units eliminate the adhesive layer that caused the original failure.
Update Uconnect Software
Outdated firmware causes stability issues, including black screens, frozen displays, and sluggish touchscreen response. Uconnect systems receive periodic updates that patch software bugs and improve compatibility with newer smartphones.
Check your current software version by navigating to Settings > System Information on your Uconnect display (if it’s working). Compare this version number against the latest release available on Jeep’s update portal.
Update Methods
Over-the-air (OTA): Downloads automatically if your vehicle has an active connected services subscription.
USB method (works for all models):
- Visit the Uconnect Update website
- Enter your VIN to identify your specific radio version
- Download the update package (typically 2-4GB)
- Extract files to the root directory of a formatted USB drive (FAT32 format, 8-16GB capacity)
Insert the prepared USB drive into your vehicle’s USB port with the ignition on but engine off. The Uconnect system automatically detects the update files and prompts you to begin installation. This process takes 20-45 minutes—do not turn off the vehicle or remove the USB drive until completion, as interruption can corrupt the system.
After updating, the system reboots automatically. Software updates occasionally resolve black screen issues caused by memory leaks or process crashes in earlier firmware versions.
Understand Warranty and Goodwill Coverage
Jeep’s factory warranty covers the Uconnect system for 3 years or 36,000 miles under the basic vehicle warranty. Screen defects appearing within this window receive free repair or replacement at any authorized dealer.
The 2022-2023 Compass received a recall (Campaign 23V-058, Recall 88A) for instrument cluster brightness issues caused by incorrect BCM software. No official recall exists specifically for Uconnect screen delamination, despite widespread failures affecting tens of thousands of vehicles.
However, Stellantis has approved numerous “goodwill” repairs—free part replacements authorized on a case-by-case basis for customers who escalate complaints through Stellantis Customer Care (1-800-853-1403). Success rates improve when you demonstrate that the failure is due to a known defect rather than user damage.
Before paying for repairs:
- Contact Stellantis Customer Care and open a case file
- Explain your symptoms and the troubleshooting completed
- Mention the known delamination defect
- Document everything: take photos of screen condition, note dates symptoms started, and keep records of related warning messages
Multiple owners report receiving free screen replacements for vehicles with 40,000-65,000 miles after persistent follow-up with customer care and their local service department.
Prevent Future Screen Problems
Heat represents the primary enemy of Uconnect screen longevity. Park in shaded areas whenever possible during summer months, as direct sunlight through the windshield raises dashboard temperatures to 160-180°F—enough to accelerate adhesive breakdown.
Protection strategies:
- Use a windshield sunshade when parking outdoors for extended periods (reduces interior temperatures by 20-30°F)
- Check for Uconnect software updates every 6-12 months
- Clean the touchscreen only with microfiber cloths and water or screen-safe solutions (avoid harsh chemicals)
- Clean dust and debris from USB ports monthly
Screen issues in the Jeep Compass frustrate owners, but most cases resolve through systematic troubleshooting. Software resets and fuse checks cost nothing and solve 70% of black screen complaints within minutes. When hardware replacement becomes necessary, DIY repairs cost a fraction of dealer service while delivering permanent fixes. Recognizing symptoms early and acting quickly prevents small glitches from escalating into complete system failures.