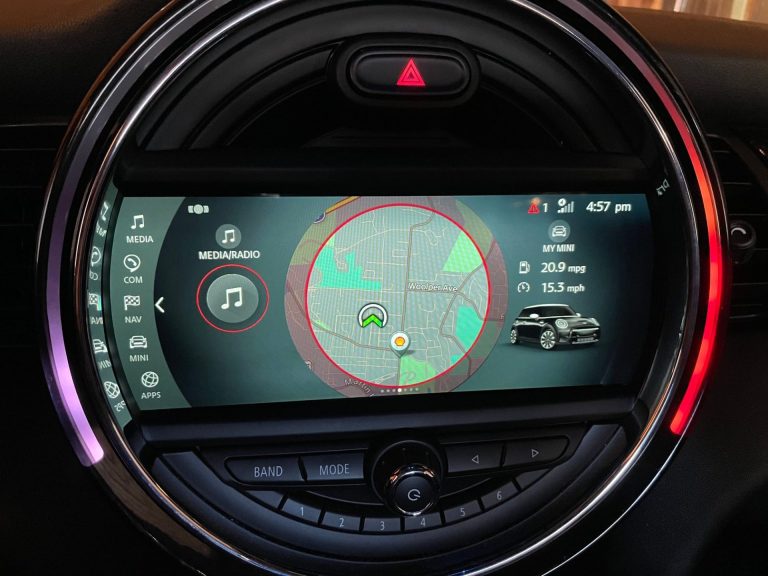
How to Retrofit Bluetooth in a Mini Cooper: A Step-by-Step Guide

Adding Bluetooth to your MINI Cooper is absolutely doable. The right approach depends on your model year, your existing head unit, and whether you need hands-free calling only or full music streaming too. Older MINIs typically need an OEM retrofit module, a plug-and-play adapter, or a complete head unit swap.
Get the compatibility check right first. That one step prevents the most common and expensive mistakes.


Step 1: Check Your Mini Cooper Model Year and Head Unit
Compatibility is everything. Before buying a single part, you need to know your generation and what’s already in the car.
MINI’s Bluetooth retrofit options differ significantly across generations:
- R50/R53 (2002–2006): First-gen MINIs with basic head units; very limited factory Bluetooth support, mostly adapter or head-unit-swap territory
- R56/R55/R57 (2007–2013): Mid-gen cars with better factory prep; OEM ULF module retrofits are possible on many trims
- R60/R61 (2011–2016): Countryman and Paceman; often came with optional Bluetooth prep, so a factory retrofit is more realistic
- F56/F55 (2014–present): Modern cars with ConnectedDrive; most support direct OEM activation or module-level retrofits
Check whether your car already has an AUX input, a USB port, or a factory phone prep connector. These tell you how far along the factory already took things. You can find detailed generation differences in this Mini Cooper R53 vs R56 comparison, which covers audio system differences between those two popular generations.
Still unsure if your MINI shipped with any Bluetooth at all? The Do Mini Coopers Have Bluetooth? guide answers that question by model year and trim level. Also worth reading before you commit: this connected enhanced Bluetooth retrofit owner thread highlights module-specific decision points that catch many buyers off guard.
Knowing your Mini Cooper vs Cooper S variant matters too. Cooper S models sometimes include additional wiring provisions from the factory.
Common mistake: Buying a kit before confirming head unit compatibility. A module designed for an R56 won’t plug into an R50.
Step 2: Choose the Right Bluetooth Retrofit Method
Three main paths exist. Each has real tradeoffs.
| Method | Best For | Main Tradeoff |
|---|---|---|
| OEM retrofit kit | R56–R60 owners wanting factory integration | More parts, possible coding needed |
| Plug-and-play adapter | R50/R53 or budget installs | Limited integration, no steering wheel controls |
| Aftermarket head unit | Full smartphone integration | Loses OEM look, requires fitting harness |
OEM Retrofit Kit
This is the cleanest option for mid-generation MINIs. It uses genuine MINI or BMW ULF (Ultra Low Frequency) Bluetooth modules that integrate with the factory audio bus. The official MINI Bluetooth retrofit kit covers which generations this originally applied to, along with pricing context from the original announcement. Real-world install experiences are documented in this OEM Bluetooth retrofit discussion, including module placement and coding notes from owners.
Plug-and-Play Adapter
Adapters like iSimple or GOgroove connect via AUX or FM. They’re cheap and fast. But they don’t integrate with steering wheel controls, and call quality is usually noticeably lower than OEM. If you’re mainly streaming music, check out the Mini Cooper 2015 Bluetooth Music Guide to understand what native streaming looks like on newer cars before settling for a workaround.
Aftermarket Head Unit
Pioneer, Kenwood, and Alpine all make single-DIN units that fit MINI’s non-standard dash. You’ll need a MINI-specific fascia adapter. This gives you the best modern feature set, including Apple CarPlay and Android Auto, but it does sacrifice the factory look. Understanding What Are Mini Driving Modes and infotainment expectations can help you decide whether modern features matter enough to justify the swap.
For a modern F56 example, the F56 Bluetooth retrofit case study from Cartronics shows Bluetooth and AUX integrated into a current-generation car cleanly.
Common mistake: Overbuying an OEM kit when a $30 adapter would meet your actual needs.
Step 3: Gather the Parts, Tools, and Accessory Modules
Don’t start tearing out trim until everything is on the bench.
Parts Checklist
- Bluetooth module (OEM ULF, aftermarket adapter, or new head unit)
- Dedicated microphone with mounting clip
- Wiring harnesses (ISO adapter or vehicle-specific plug)
- Antenna adapter if required by your head unit
- USB/AUX integration cable for R55/R56/R60 installs
The Bluetooth and USB upgrade guide for R55, R56, and R60 models is a useful contemporary reference for what a plug-and-play kit includes.
Tool Checklist
- Plastic trim removal pry tools (metal tools can crack MINI’s brittle clips)
- Trim panel removal clips and a clip-collection tray
- Screwdrivers: T20 and T25 Torx, Phillips, flathead
- Electrical tape and cable ties
- Multimeter for checking power/ground at the module harness
Optional Accessories
- OBD2 coding cable if activation is required
- Extra OEM trim clips (they break on older cars — buy spares)
Common mistake: Forgetting the microphone entirely. Many Bluetooth kits ship without one. Calls won’t work without it.
Step 4: Install the Bluetooth Hardware
This is where patience pays off. MINI interiors are tight, and the plastic trim clips are fragile on older cars.
Remove Trim and Access the Radio Area
Disconnect the negative battery terminal first. This protects you and prevents accidental airbag deployment on cars with steering column-mounted controls. If you’ve never disconnected your battery before, the How to Jump Start a Mini Cooper guide covers battery safety basics that apply here too. Wondering about spare tire storage before you start moving panels? The Do Mini Coopers Have Spare Tires? guide explains what’s under the floor if you’re accessing the rear area for wiring runs.
Use plastic pry tools only. Start at the center console surround and work outward. On R50/R53 cars, the center stack lifts out after removing two screws behind the ashtray. R56 cars need the climate panel removed first before the head unit slides out.
Mount the Module
For OEM ULF modules, the common mount location on R56 cars is behind the glovebox or in the center console void. Secure the module with its bracket — don’t let it float loose. A loose module rattles and risks a short circuit.
Check the R53 OEM Bluetooth retrofit thread for generation-specific placement examples from owners who’ve done this on the same platform as your car.
Route and Connect the Microphone
Run the microphone cable along the A-pillar trim. Tuck the cable behind the headliner seal to keep it hidden. The mic itself mounts best at the top of the A-pillar or on the sunvisor strip — pointing toward the driver’s mouth for clearest audio pickup.
Don’t route mic cables alongside power cables. Interference kills call quality.
Reassemble Carefully
Reconnect the battery. Test everything before snapping trim back in. You can’t fix a wiring mistake from outside the car.
Common mistake: Forcing trim clips back without aligning them. MINI clips break easily. Press straight down — not at an angle.
Step 5: Code, Pair, and Activate the System
Some retrofits work immediately after install. Others need coding.
Coding and Activation Basics
OEM ULF modules on R56 and R60 cars typically need activation via BMW/MINI coding software — either ISTA/D (dealer tool) or NCSExpert with the correct coding string. A quality Best OBD2 Scanner for Mini Cooper with coding capability can handle this on supported hardware. You can also use a Mini Cooper Software Update check to confirm your car’s current software is compatible before coding the module. Community members share activation steps and coding strings in this Bluetooth retrofit coding notes thread — it covers module compatibility and what fields to change.
Plug-and-play adapters and aftermarket head units don’t need coding. They’re active as soon as they’re powered.
Pairing Your Phone
Go to Settings > Bluetooth on your phone. Power on the MINI’s Bluetooth system — on OEM systems, this is done through the iDrive or audio menu. Select the MINI device from your phone’s pairing list. Enter the PIN if prompted (usually 0000 or 1234 for OEM modules).
Testing Call and Music Functions
Call a number and confirm the audio routes to the car speakers. Ask the other party whether your voice is clear — not just audible, but clear. Then test music streaming via A2DP (Bluetooth audio profile). Not all modules support both profiles. Check your module specs before assuming music will work.
Common mistake: Assuming pairing means the retrofit is complete. Always test both voice and audio before reassembling trim.
Step 6: Troubleshoot Common Problems
Something not working? Start here before ordering replacement parts.
Bluetooth Not Pairing
- Confirm the module is powered (check fuse and harness connection)
- Delete the MINI device from your phone’s saved Bluetooth list and re-pair from scratch
- Verify the module is in pairing mode — some OEM modules time out after 60 seconds
No Sound or Poor Sound
- Check audio source selection on the head unit (must be set to “Phone” or “BT Audio” mode)
- Confirm the correct ISO harness pin is used for audio input
- Test with a second phone — the issue may be device-specific
Calls Work but Music Does Not
This is common. It means the module supports HFP (hands-free profile) but not A2DP (advanced audio distribution profile). OEM ULF modules on older cars are often calls-only. You’ll need an adapter or head unit swap to add music streaming.
If you’re still stuck after checking all three, the Best OBD2 Scanner for Mini Cooper with live module data can reveal whether the Bluetooth ECU is even communicating with the car.
Common mistake: Swapping the module when the actual fault is a misconfigured audio source.
Is a Bluetooth Retrofit Worth It for Your MINI?
It depends. Really.
For daily drivers who want wireless calling and music, an OEM retrofit or plug-and-play adapter pays off quickly. The setup feels factory-clean and adds genuine usability. Given the broader are Mini Coopers expensive to maintain and repair? ownership picture, a £50–£150 DIY Bluetooth upgrade delivers good value relative to dealer-installed alternatives.
For classic R50/R53 owners who use the car sparingly, a simple AUX adapter or a best phone holder for mini cooper mount plus a wired connection may be all that’s needed. Not every car needs a full OEM retrofit.
For owners who want CarPlay, Android Auto, or a modern audio experience, skip the OEM retrofit entirely. Go straight to an aftermarket head unit. Pair it with the best subwoofer for mini cooper upgrade, and you’ll have a genuinely modern audio system in a classic package.
FAQ About Mini Cooper Bluetooth Retrofits
Can I add Bluetooth to any MINI Cooper?
Yes, but the method differs by generation. R50/R53 cars need adapters or head unit swaps. R56 and newer can use OEM ULF modules with coding.
Does the retrofit support music streaming?
OEM modules on older cars often support calls only. To stream music, confirm your module supports the A2DP profile, or use a modern adapter or head unit instead.
Do I need coding for a Bluetooth retrofit?
OEM ULF modules usually need coding to activate. Plug-and-play adapters and aftermarket head units do not.
Can I keep steering wheel controls?
With OEM retrofits, yes. With most plug-and-play adapters, no. Aftermarket head units require a steering wheel control interface module to retain button function.
Is OEM retrofit better than an adapter?
OEM integration is cleaner and more reliable. Adapters are faster and cheaper. Choose based on how much you use the feature daily.
Conclusion
Model-year compatibility is the most important decision you’ll make in this process. Get that right and everything else follows logically.
For most MINI owners, the path is clear: R50/R53 cars get an adapter or head unit swap; R56–R60 cars support a proper OEM ULF module retrofit with coding; F56 and newer cars often just need module activation. Test audio and call quality before snapping trim back into place — it saves a second full disassembly.
Choose the simplest option that meets your daily driving needs. That’s always the right call.